 |
Using BlueZone for FTP |
The UIS FTP icon will start an FTP session for file transfers to/from the UIS mainframe.
The FTP icon will allow user customization to connect and transfer files to/from any other FTP site.
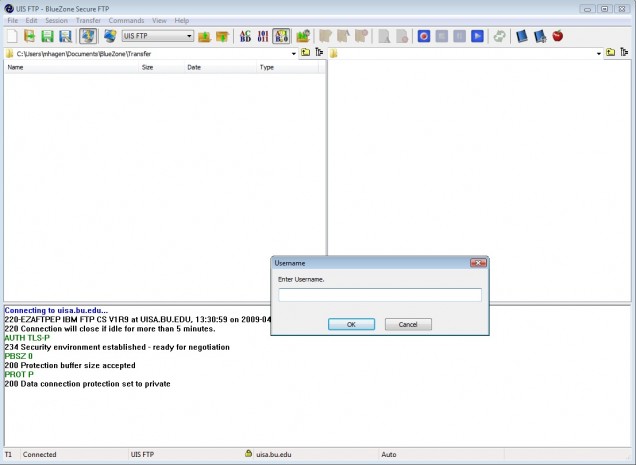
To log in to UIS FTP:
- Enter your UIS User ID.
- Enter your UIS password, followed immediately by a colon, then your SecureID number (format = password:SecureID, no spaces).
- Click OK.
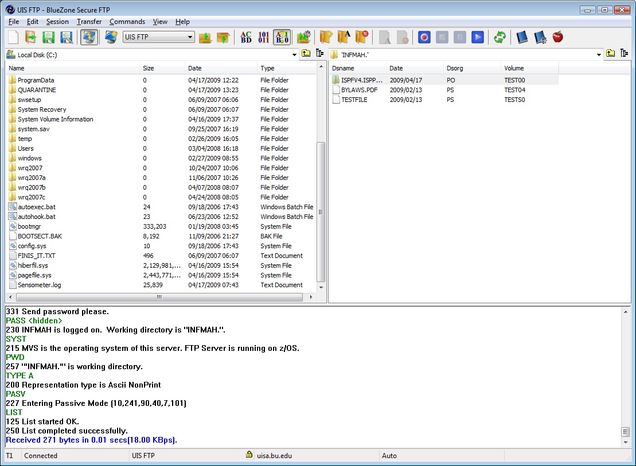
FTP Main Screen
The main screen of the BlueZone FTP Client is shown below. On the left side of the screen are the files in your current PC directory (in this case, C:). The files listed on the right side of the screen are in your current UIS directory (INFMAH, in this case).
For details on using and configuring the BlueZone Secure FTP, see the BlueZone help file.
Quick File Transfer
There are three quick ways to transfer a file:
- Option 1: Click and drag it from one side of the screen to the other. When you release the mouse button, the file will transfer.
- Option 2: Click on a file to select it, then click on either the Send File or Receive Files buttons along the top menu. Or,
- Option 3: Right-click on a file to select it and bring up a context sensitive menu. Select Receive to download a file to your PC. Select Send to upload a file to the mainframe.
Please Note: The FTP session will automatically time out and disconnect after five minutes of non-use. There is no warning or pop-up message. In this case, go to the Session menu, select Connect and log in again.
Changing Directories
- Mainframe: Click in the UISA Directory field, delete the existing directory name, and type the directory name that you want to go to. You must include a single quote ( ‘ )at the beginning and end of your directory name, such as ‘SO.USER.INFMAH’. You can also go up or down the directory chain by either clicking on the up folder button (next to the directory field) or by double-clicking on a folder icon in the file list, respectively.
- PC: Click in the Local Directory field, delete the existing directory name, and type the directory name that you want to go to. You can also go up or down the directory chain by either clicking on the up folder button (next to the directory field) or by double-clicking on a folder icon in the file list, respectively.
Transfer Type
By default, the transfer type is set to auto. This means that BlueZone will determine whether to transfer the file in ASCII or in Binary format. This can be changed manually.
- ACII: Click on the ABCD button (most data transfers should use this).
- Binary: Click on the 101011 button (most program transfers should use this).
- Auto: Click on the AB/10 button.
Setting File Specifications on UIS
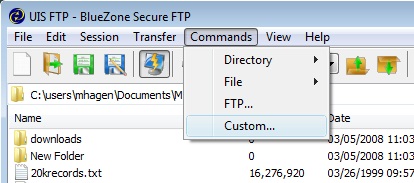
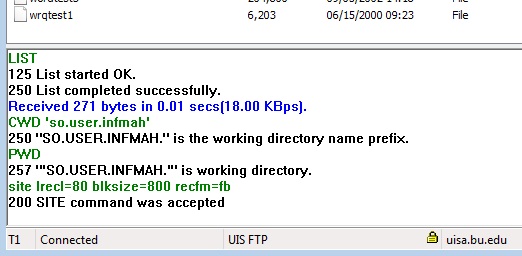
When transferring a file to the UIS mainframe (uploading), it may be necessary to provide the file’s specifications: logical record length, block size, and number of tracks (if it is sufficiently large). To do this, select Custom from the Commands menu (see below).
Enter in the appropriate site command. (In the example below, the record format is set to fixed, the logical record length is set to 800, and the block size is set to 8000.)
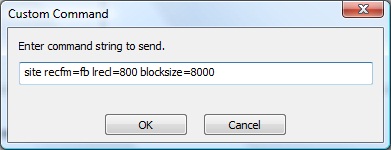
Click OK. Confirmation of the command is displayed in the status window below the PC and mainframe directory listing windows. (See below, SITE command was accepted).
Setting FTP Session Defaults
You can set the way that BlueZone FTP starts — specifically, what PC and what UIS directories are displayed when you first log in. If you do repeated file transfers, it will be convenient to set these defaults.
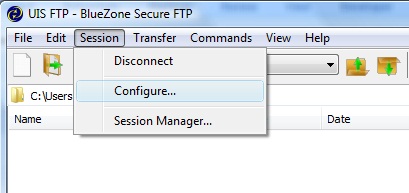
First, select Configure from the Session menu (see below).
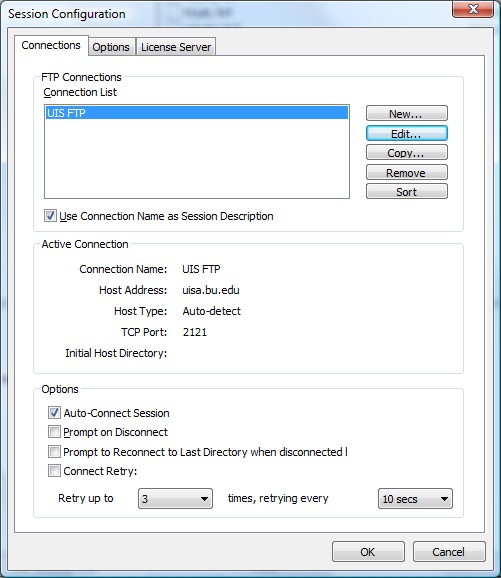
Next, click on the Edit button from the Session Configuration dialog box (see below).
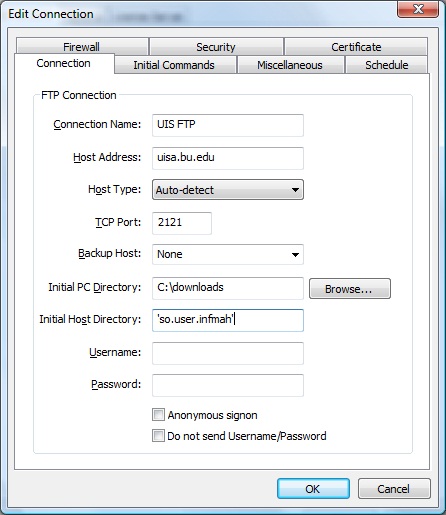
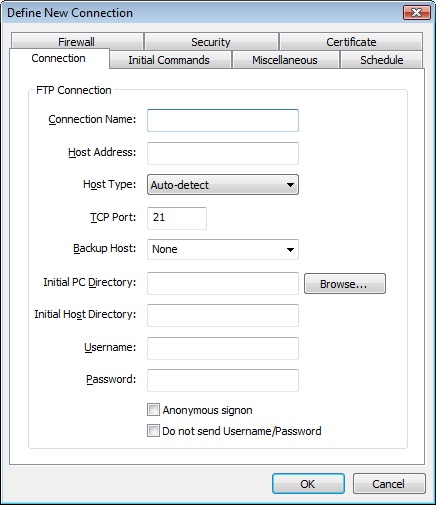
Finally, in the Connection tab, enter (or browse to) the path for:
- Initial PC Directory
- Initial Host Directory (Note: be sure to begin and end the directory name/path with a single quote ( ‘ ). See example, below.)
More details on setting the initial directory can be found in the Connection Tab sub-section of the Connecting to the Host System section in the BlueZone help file.
BlueZone FTP to Another (Non-UIS) Site
BlueZone can be used to transfer files to/from other, non-UIS sites. Click on the FTP desktop icon. Then, click on Connect from the Session menu and fill in the Connection Name, Host Address, and any other necessary information for connecting to the FTP site, then click OK. (See below.)
You’ll next be prompted for User ID and Password.
See the BlueZone help file for details on configuring and using the FTP client for non-UIS sites.
If you have problems, please contact us at 617-353-4868 or uis-desktopsupport@bu.edu.