The settings outlined on this page may vary slightly across devices and versions, but these instructions should be generally applicable to all users of the iOS.
Note: After you configure Exchange as described below, you might also want to get BU Mobile – BU’s suite of applications for the iPhone, iPod touch and iPad.
For iOS 10 and newer
Configuring the Mail client
You can connect your device to the Exchange server by following these steps. You can also follow this video to set up email on an iOS device.
- Tap Settings.
- Tap Mail.
- Tap Accounts.
- Tap Add Account.

- Tap Microsoft Exchange.

- Fill in the following information
- Email is your complete email address, which is login@bu.edu (where login is your BU login name).
- Description is the name your Exchange account will have on your device and will be displayed in a list if you have more than one email account configured.
- Tap Next to continue.
- Choose whether to Configure Manually or Sign In. The Sign In method is preferred. If you wish to Configure Manually, the necessary server settings are available on the ActiveSync – General Settings page.
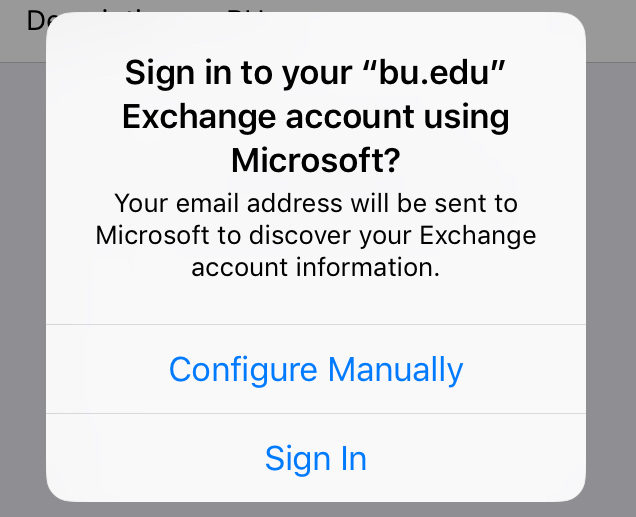
- Sign in via the Office 365 login page.

- Tap Save.
Your device will connect to the Exchange server with the information you have entered. It will take a few minutes to synchronize your device and the Exchange server. When it’s done, your most recent email, calendar items, reminders, and Exchange Contacts will be viewable on your device.
The next step is to adjust a few settings for your Exchange account.
- Tap the account you just created to see the Exchange settings page. Make sure the switches for Mail, Contacts, Calendars, and Reminders are switched ON or OFF, depending on your preference.
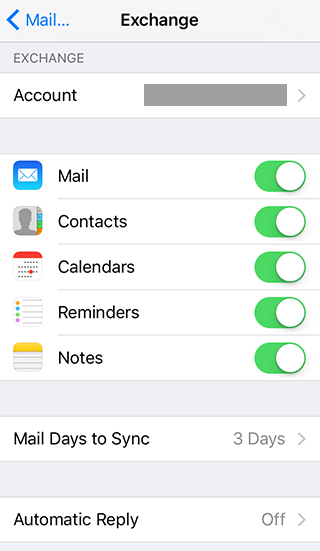
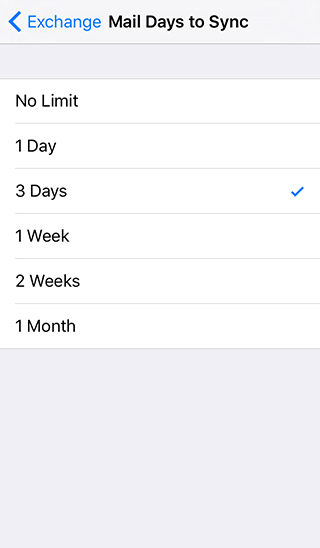
- Then click the Mail Days to Sync button. Tap one of the options, depending on your preferences. Choosing No Limit is not recommended and 1 Month is the maximum.
For iOS 9 and older
Configuring the Mail client
You can connect your device to the Exchange server by following these steps. You can also follow this video to set up email on an iOS device.
- Tap Settings.
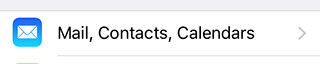
- Tap Mail, Contacts, Calendars.
- Tap Add Account.
- Tap Microsoft Exchange.
- Fill in the following information
- Email is your complete email address, which is login@bu.edu (where login is your BU login name).
- Password is your Kerberos password.
- Description is the name your Exchange account will have on your device and will be displayed in a list if you have more than one email account configured.
- Tap Next to continue.
- Tap Save.
Your device will connect to the Exchange server with the information you have entered. It will take a few minutes to synchronize your device and the Exchange server. When it’s done, your most recent email, calendar items, reminders, and Exchange Contacts will be viewable on your device.
The next step is to adjust a few settings for your Exchange account.
- Tap the account you just created to see the Exchange settings page. Make sure the switches for Mail, Contacts, Calendars, and Reminders are switched ON or OFF, depending on your preference.
- Then click the Mail Days to Sync button. Tap one of the options, depending on your preferences. Choosing No Limit is not recommended and 1 Month is the maximum.
For Microsoft Outlook App
Configuring the Microsoft Outlook App
You can connect the Microsoft Outlook app to your Exchange account by following these steps.
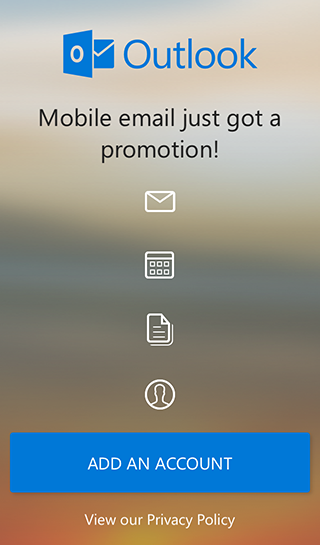
- Once the application is open, tap Add an Account.
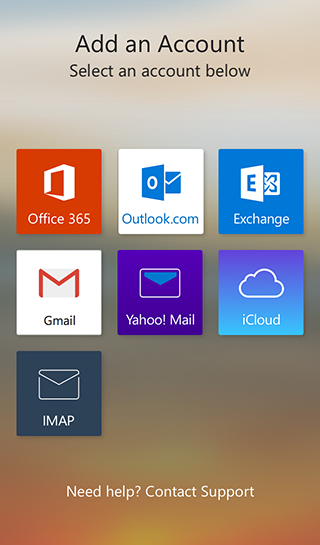
- Tap the Exchange icon.
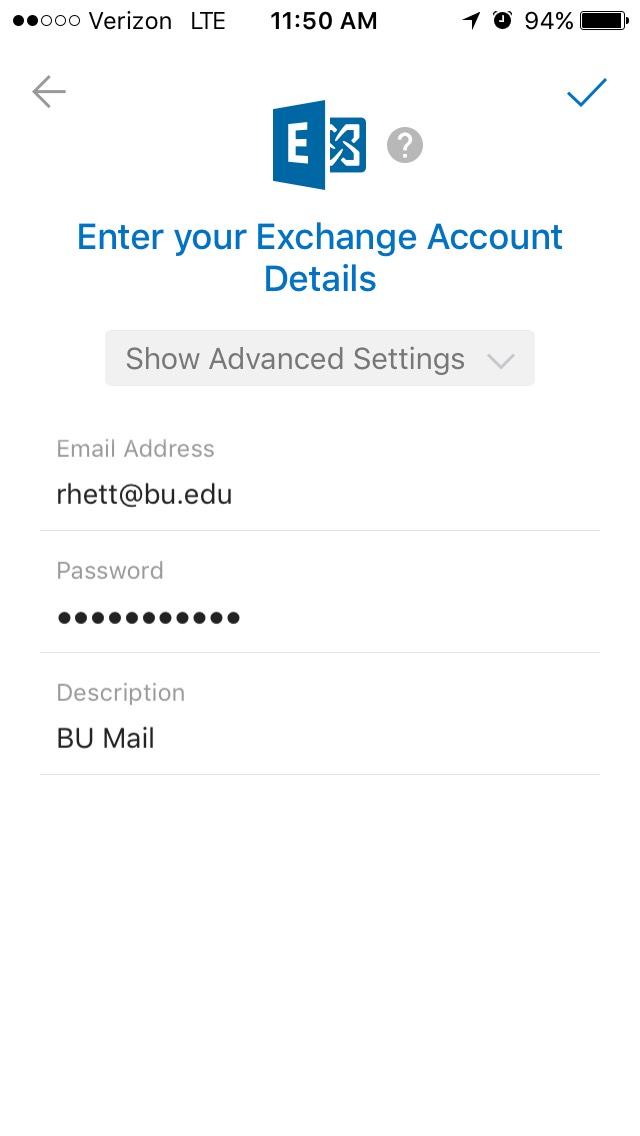
- Enter your @bu.edu email address, password, and description for the account.
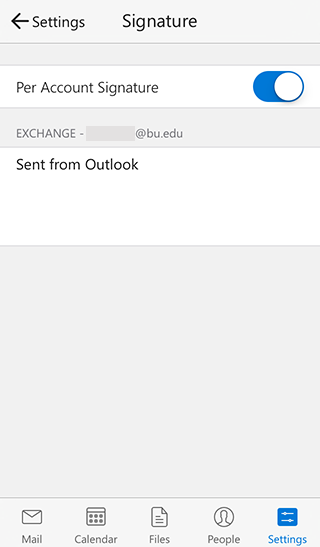
- Once the account has been added, you can configure various options by tapping the Settings icon.
- Toggle the Focused Inbox on or off.

- Set your Signature for the Outlook app

To Remove an Account
Removing an Account on an iOS Device
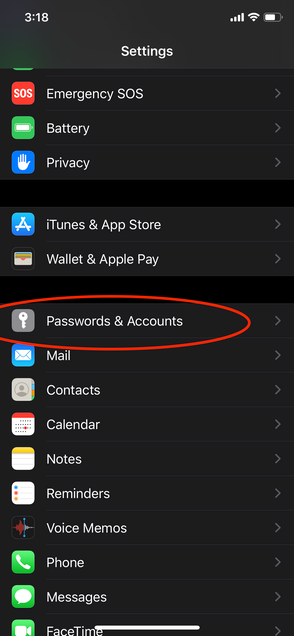
1. First, go to your device settings (icon pictured)

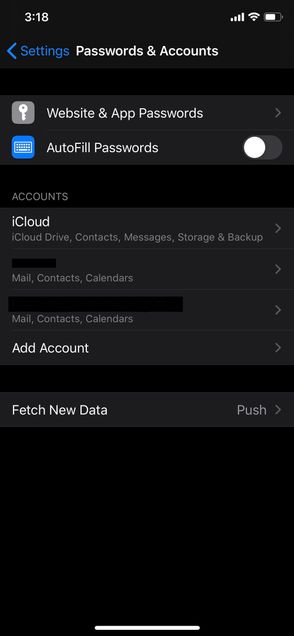
2. Once in your settings, select Passwords & Accounts
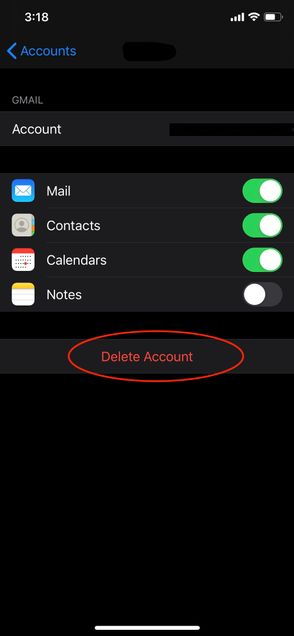
3. Select the account you want to remove from your Account list
4. At the bottom of the page, select “Delete Account”
Once you’ve done this, you have removed your account from your iOS device!
Please note: this does not mean you have deleted that account permanently, it just means that it is no longer connected to that specific device.