Zoom Cloud Recordings are retained for up to one year from the date they were created. You can use the Zoom website to confirm when a recording will be deleted automatically, move a recording to the trash, permanently delete recordings, or recover a recording from the trash.
Confirming When a Recording Will Be Deleted Automatically
Zoom will show how many days are remaining until a recording is automatically deleted on the Recording & Transcripts section of the website.
- Log in to Zoom Meetings using your BU Login.
- Click the “Recordings & Transcripts” link, located on the left side of the page.
- Scroll the recordings list to the right. The last column will indicate how long until auto deletion takes place.
- If your recordings appear as tiles, click the list view icon towards the right, next to the Export button.
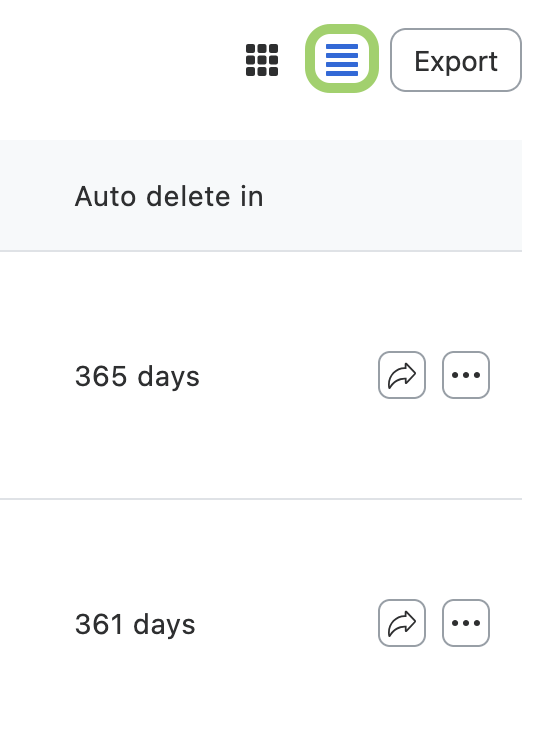
If one of your recordings has been protected from auto-deletion, this column will show “Disabled” for that recording instead.
Moving Recordings to the Trash
Recordings no longer needed may be moved to the trash at anytime. After 30 days in the trash, the recording will be deleted permanently.
- Log in to Zoom Meetings using your BU Login.
- Click the “Recordings & Transcripts” link, located on the left side of the page.
- To delete an individual recording, click the … button at the lower right of its tile or on the right side of its row when in list view.
- When in list view, you can delete multiple recordings by using the check boxes on the left side of the list. Once you have made your selections, click the Delete button that appears above the list.

Permanently Deleting Recordings
If you need to immediately and permanently delete a recording before Zoom deletes it automatically, you may do so from the Zoom recording trash. A permanently deleted recording is unrecoverable.
- Log in to Zoom Meetings using your BU Login.
- Click the “Recordings & Transcripts” link, located on the sidebar to the left of the page.
- Locate and click the “Trash” tab at the top of the page.
- Locate the recording you wish to permanently delete, then click the “Delete” button. You can also use the check boxes to select and purge multiple recordings at once.
Recovering Deleted Recordings
If you need to download a recording that was deleted, you may recover it for up to 30 days after it was sent to the Zoom cloud recording trash. Recovered recordings will return to the trash the next day. Once returned to the trash, the 30-day recovery window restarts.
- Log in to Zoom Meetings using your BU Login.
- Click the “Recordings & Transcripts” link, located on the sidebar to the left of the page.
- Locate and click the “Trash” tab at the top of the page.
- Locate the recording you wish to recover in the list, then click the “Recover” button. You can also use the check boxes to select and recover several recordings at once.