Kaltura Capture is a quick way for you to record anything you can show on your computer screen, including PowerPoint presentations, websites, and applications, while allowing you to record your voice while you are recording. To install and use Kaltura Capture, use the following steps and tutorials:
Install the Recording Client
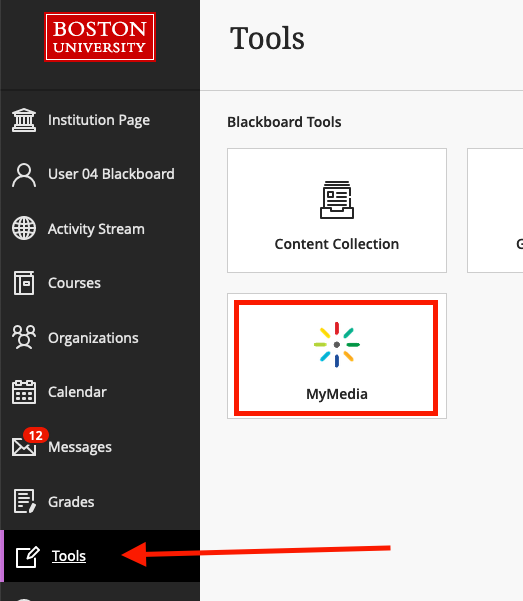
- Log in to Blackboard at learn.bu.edu and select MyMedia from the Tools area.
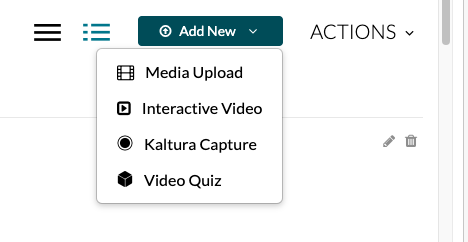
- When the My Media page loads, click the Add New button and select Kaltura Capture.
- A screen will load which allows you to download the recording client for Windows or Mac. Download and open/run the installation file that you need for your system.
- When the install completes, you will see a shortcut appear on your desktop, but the client still needs to be configured. Repeat step 2 by going back to your My Media list and again select Add New >> Kaltura Capture, but rather than downloading the installation file, wait a moment for the client to configure and launch automatically. You will see a Kaltura Capture icon loading icon appear and the recording controls will appear when configuration is complete.

Loading Icon
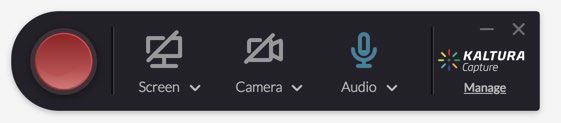
Recording Controls
- You can select multiple combinations of screen, webcam, and microphone using the source buttons on the recording controls. Clicking on the Screen, Camera, or Audio icons will enable or disable the sources. Active sources will appear in blue and if you have multiple inputs to select from for a given source, those can be selected from on the drop-downs beneath each the source buttons.
- When you have selected your sources, click the red record button. A countdown timer will display and the recording will start after the countdown. A timer will show the elapsed time of the recording on the controls.
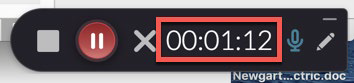
- When finished, click the stop button and confirm that you do want to stop.
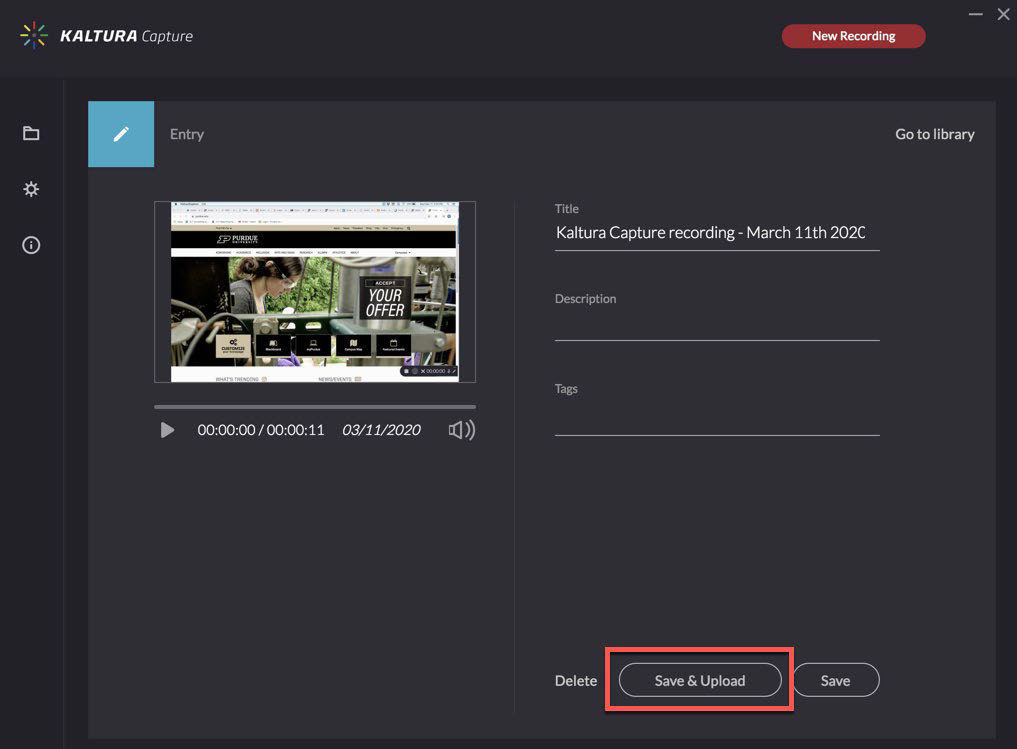
- A screen will load where you can preview the recording and enter a name, description, etc. for the video. Click the Save & Upload button when complete.

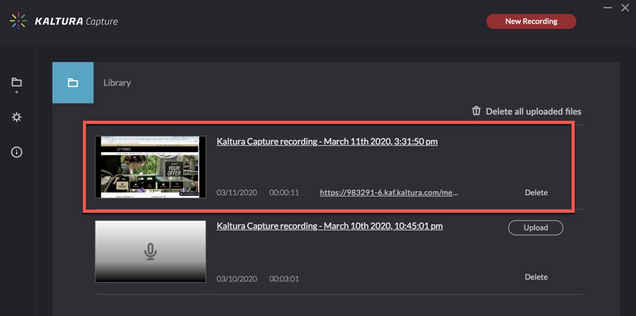
- The recording will then begin to upload and will appear in your local library. When upload completes, it will appear in your Kaltura My Media list when it finishes processing.
- Locate the video you would like to insert and click Select. Alternatively, you can insert your video into any textbox location where you see the “Mashups” button.
Getting Started with Kaltura Personal Capture Application (Video Tutorial)
How to Set and Create a Presentation Recording with Kaltura Personal Capture (Video Tutorial)
Kaltura Personal Capture Walkthrough (Video Tutorial)