Please see the sections below for information regarding the installation and use of Examplify:
Downloading and Installing Examplify
The information on this page pertains to schools that are using the Enterprise Portal. Schools on the Legacy Portal (MED/GMS, SDM, LAW) will have different instructions. A video tutorial demonstrating installation can be found here: Examplify - Installation and Registration
Installing Examplify
1. Go to https://ui.examsoft.io/login?institutioncode=BostonUniversity and click the “LOGIN” button.

2. This will bring you to a page to enter your BU login name and Kerberos password. Please note: at this point, you should be on a BU login webpage and not an ExamSoft login page.
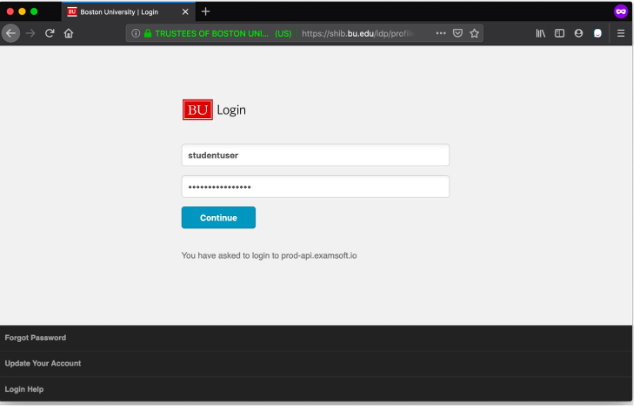
3. Once you are logged in, click the “Download Examplify” button in the upper right of your dashboard, select “yes” and then choose your operating system. (Your portal may look slightly different.)

*Examplify is only available for Mac or PC laptops/desktops, Microsoft Surface Pro, and the Apple iPad. It is not compatible with Chromebooks, smartphones, tablets (other than those mentioned above), other 2-in-1 devices, virtual environments, and ARM processors. Check the
- Examplify for iPad is downloadable directly from the Apple App Store
- Surface Pro devices cannot be running Windows in “S” mode: https://examsoft.force.com/etcommunity/s/article/Changing-from-Windows-10-S-to-Windows-10
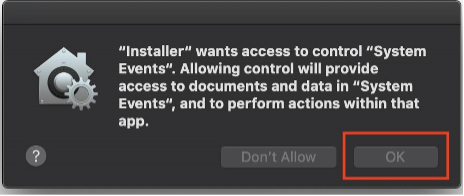
4. Install the software as normal on your machine. You may encounter a window asking for permissions, such as the one below. Be sure to allow the requested permissions.
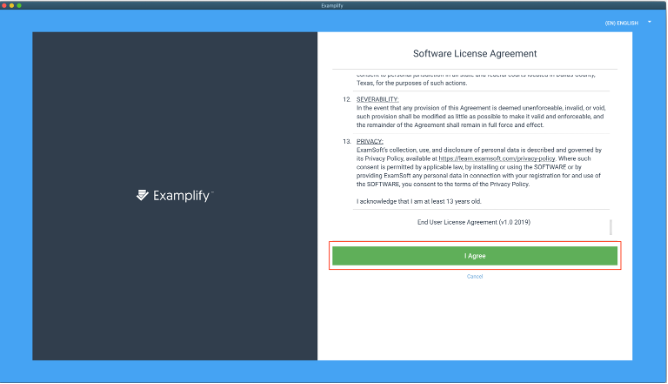
5. Once installed and launched, Examplify will ask you to read and agree to the software license agreement. Scroll to the bottom until the button turns green and click “I Agree.”
6. On the Add New Account page, type in Boston University and look for the option of “BostonUniversity” (no spaces), select that, and click next.
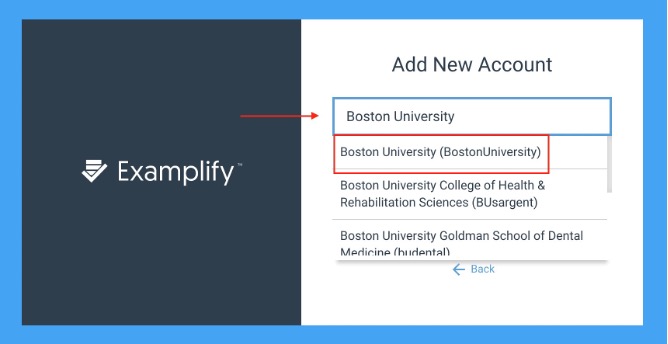
*Courses in CAS, QST, and SAR using ExamSoft must select “BostonUniversity” (no spaces or department names) as their institution
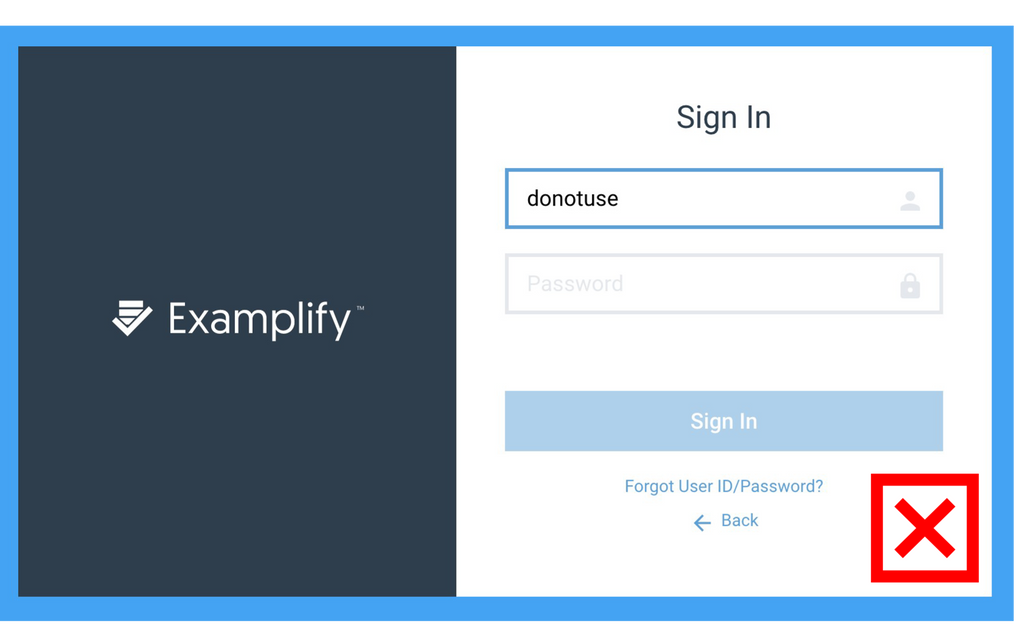
7. This will open up a browser window/tab bringing you directly to a BU login page. Be sure you log in with your BU credentials on this new webpage and NOT directly in Examplify. This will connect Examplify to your ExamSoft account.
Enter login credentials here:

Do NOT enter login credentials here (in Examplify software):
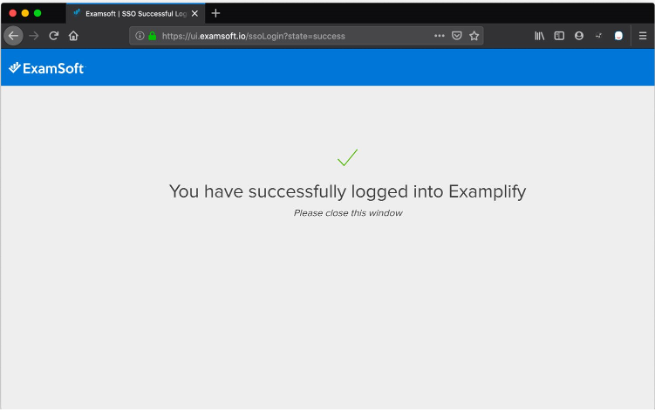
8. You should see the following screen once you have logged in successfully.
*If you receive an error when trying to log in on this final step, see our troubleshooting guide and go back to step 6. You MUST have Chrome or Firefox set as your default browser.
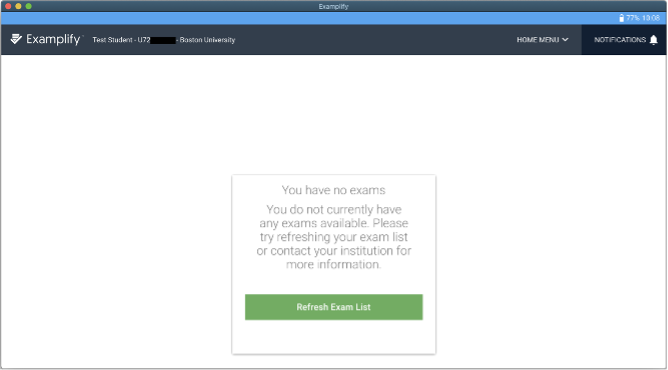
9. Once you successfully login through the browser, the Examplify software will automatically bring you to your dashboard.
Disable Automatic Updates
It is important that automatic updates for your device are turned off. When Apple and Microsoft release new operating system updates, ExamSoft must first test and verify Examplify's compatibility with the new OS. If your device is updated before ExamSoft confirms the compatibility, you may be prevented from taking any exams.
macOS
- On your Mac, choose the Apple menu icon in the top left of your screen.
- Select System Preferences, then select General. Open the Software Update tab.
- The Off/On status is indicated next to the information icon. If you need to change the status from On to Off, select the information icon next to automatic updates.
- Then, toggle each selection to off.
- Once all of the toggles are in the off position, select Done, and you will then see the Automatic updates status change to Off.
Windows 11
- Open Settings
- Click on “Windows Update”
- Click the dropdown for "Pause updates" and choose the number of weeks (up to five) for which to disable automatic updates on Windows 11
Windows 10
- Open Settings
- Click on Update & Security”
- Click on “Windows Update”
- Use the dropdown for “Pause until” to temporarily pause automatic updates
Reference: ExamSoft - How to Disable Automatic Operating System Updates
Download an Exam
- When downloads become available, log in to Examplify.
- On the left side of the screen, select the exam that you want to download.
- If you do not see the exam that you are scheduled to take, select Refresh Exam List near the bottom left corner of the screen.
- In the main area of the screen, select Download Exam.
Important: Wait until you see confirmation that the exam is downloaded. The progress bar will disappear, the status (on the left side of the screen) will be Exam File Downloaded, and the Exam Settings and Exam Details will appear in the main area of the screen.
Manually Upload an Answer File
When a student finishes an exam, Examplify will automatically upload the file to ExamSoft's servers for processing. On rare occasions, the files may not upload properly requiring students to do a manual upload. Instructions for both Mac and PC can be found here: Manually Upload an Answer File (follow the instructions referencing the "Enterprise" portal).