
This page is to help troubleshoot various tech issues in classrooms that faculty might face.
- For room specific inquiries, including what tech is included in a particular room and to see pictures, you can search your room on the Find a Classroom tool at bu.edu/classrooms
Beginning with some general basic instructions for operating the room system:
- Most rooms should have a touch panel without any physical buttons, but there are some that do still have buttons so just be aware that they all might not be exactly the same but are similar enough the instructions will still apply.
Basic Instructions
1) TURN ON THE MEDIA SYSTEM
- Tap the touch panel to wake it up, then tap Start/Power On (If it has a physical power button, press the POWER button, then tap ON)
- Some systems might require you to select a Source before the projector turns on and the screen comes down
- Status bar will progress while system warms up
- If the projection screen does not automatically lower when the system turns on, you may have to manually lower it
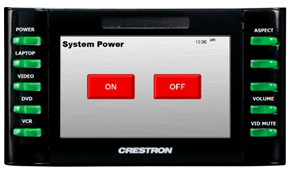

2) SELECT A SOURCE
- Press a source button (Laptop/Room PC/Wall/Podium/Lecturn/Rack etc.) *Note: In some larger rooms/auditoria you have to swipe to see additional sources
- Connect laptop or Wake up Room PC (if there is one)
- If using a laptop, be sure to choose (Wall or Rack) HDMI depending on how you are connected

3) ADJUST VOLUME
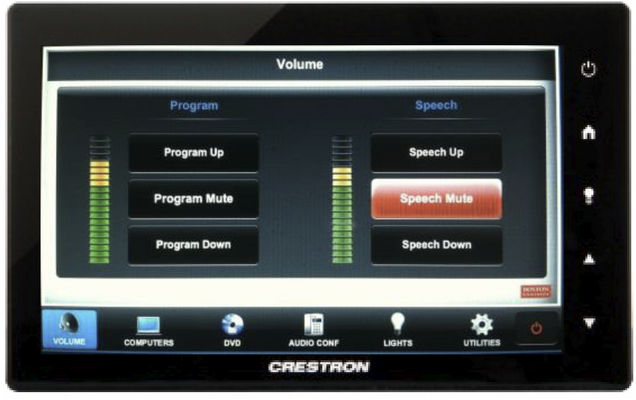
- Press VOLUME button, then adjust volume up or down as needed
- If the room is equipped with wireless microphones, there will be an option for Speech volume, as well as Program volume – which is the sound coming from the computer.
- Be sure that MUTE is not highlighted
- NOTE: This controls volume from ALL sources. Remember to check volume on your laptop
5) QUESTIONS OR EQUIPMENT PROBLEMS?
- For immediate assistance, please call LETS at (617) 353-3227
- Send an email to classrooms@bu.edu to report equipment issues
Now, here are some troubleshooting steps if you are having tech issues in a classroom:
“The computer is plugged in but there’s no image/screen is blank” :
1.) Check to see if the system has been turned on. – go to the touch panel or wall panel and hit the power button. Then, select the correct Source input for your media (e.g. Laptop, Podium PC, Wall etc)
2.) If the system is on, but the projector isn’t (has the red power off light illuminated) check the Utilities tab on the touch panel and see if someone just powered off the projector and power it back on.
3.) If everything is on, also check in the Utilities tab to see if “Image Mute” is selected – this will just make the screen black without turning off the projector, and you can switch it off to get the image back up.
4.) Check to see if the cable being used is connected firmly at both ends. (Always try unplugging and plugging back in, or if using an adapter, plugging the adapter into a different port)
5.) Try a different cable or adapter – there is often another HDMI cable in the drawer in the AV rack. You can also request another cable for the room by contacting us at 617-353-3227. Adapters can also be checked out from our office in CAS-B05
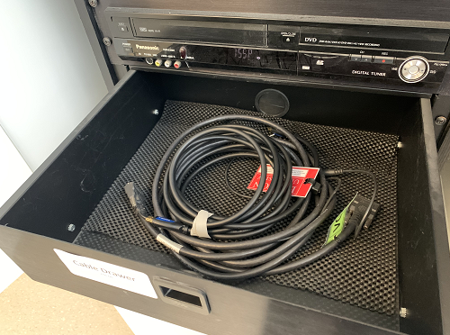
Figure 1. Cable Drawer in the AV Rack
6.) Sometimes the HDMI port on the wall panel is broken or loose - you can plug into an alternate HDMI port in the room. If it is a small room, there is still one in the AV Rack (the big black rack with all the AV equipment – usually behind some cabinet doors near the front of the room.)
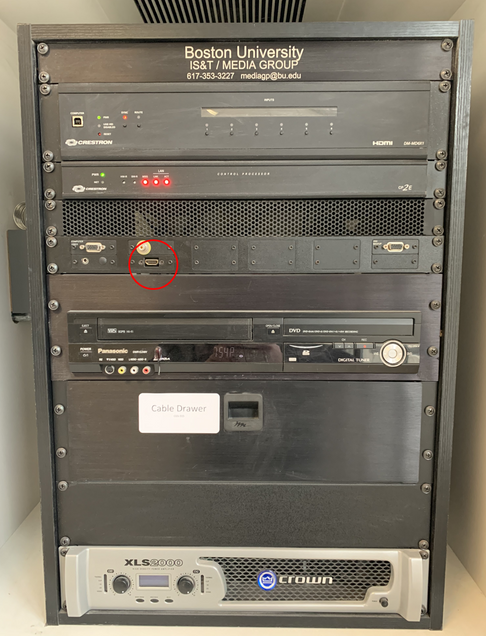
Figure 2. AV Rack with Rack HDMI input circled
7.) And when in doubt, always Restart! Quite often, many problems with technology can be solved just by restarting the device, or unplugging a cable and plugging it back in.
Common Cables and Adapters:
HDMI Should always be in each room, either out on a table or podium or in the cable drawer in the equipment rack. Digital connection, passes both audio and video in one cable

Figure 3. HDMI Cable
- USB Types
Type A is normal USB you think of, Type B is the chunkier (“printer cable”) that is generally used in the classrooms for room camera and ceiling mic connection, Type C is the standard used for most newer device charging and connections.
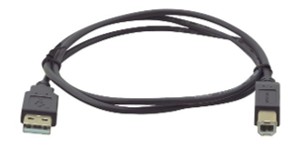
Figure 4. USB A to USB B Cable

- Adapters
USB-C to HDMI (most often used/checked out adapter), USB-C to VGA, Mini Display to HDMI or VGA

Microphone/Audio Issues
Troubleshooting options for when someone asks “I’m not getting any sound” or “The microphone isn’t working”
(Remember, wireless mics are synced to specific rooms and should not be transferred between them)
Wireless Mics
If the mic is not working:
1.) Make sure the mic is on – check the power switch on the side is set to On
2.) Check and replace the batteries (make sure they’re facing the correct way) – There should be extra batteries either on the podium or in the cable drawer in the AV Rack.
3.) Check the touch panel to see if the volume level is up or if it’s muted.
USB Connected Mics
If it’s an issue with the installed ceiling mics in a room, either for Echo360 recording or Zoom:
- First check to make sure the USB cable is connected to the computer.
If it’s a small room without a podium computer, it will be a single USB cable connected to the wall near the HDMI wall panel. If the cable is not there, check the cable drawer in the AV Rack
If you’re in a larger room with a podium computer, make sure the correct button is selected on the Extron Switchbox. If using a laptop, make sure the Laptop cable is connected and that Laptop is selected. If they’re using the PC, make sure PC is selected.
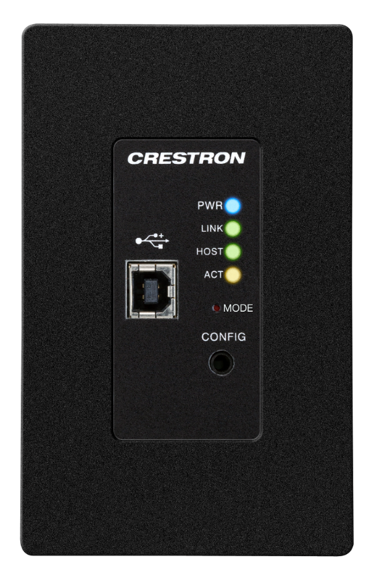
Figure 7. USB Wall Port for ceiling mics and camera
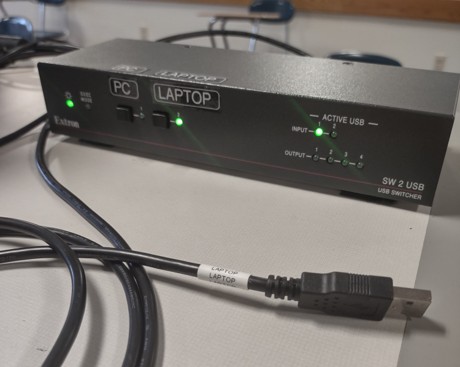
Figure 8. Extron Switchbox for Ceiling mics and camera
- This box will always be either on the podium, inside the podium cabinets, or inside the rack.
Speaker Issues
If there’s no audio out of the room speakers:
1.) Check to see if the volume is up on the touch panel and not muted
2.) Make sure the HDMI cable is plugged in
3.) If the HDMI cable is plugged in but it’s still not coming through, check the laptop’s audio output settings and make sure “Crestron” (HDMI) is selected.
Camera Issues
These will generally be solved in the same way as the ceiling mic issues. See above for details and pictures.
- If the camera isn’t showing up on their computer:
- Make sure the USB is connected and the correct source is selected (if applicable)
- Sometimes people turn off the cameras in the room for some reason. If you see that the camera is off and facing the wall, turn it on with the remote. Most rooms should have a camera remote either at the podium or in the cable drawer in the AV rack.
Computer Issues
If there is an issue with a built-in room computer:
1.) Check to make sure the computer is on – The actual computer part in the podium, not just the monitor – Make sure the power button light is on and you can hear it running.
2.) Check that the correct Source is selected on the touch panel (Podium, Room PC etc.)
3.) Check that the monitor itself is on
4.) Make sure you’re signed into the Presenter account or your own BU account on the computer
5.) If the computer is frozen and not responding, try restarting it by holding the power button down on the computer until it shuts off and turn it on again.
If there’s an issue with your laptop:
1.) A common issue might be Extended vs Mirrored display. If your laptop hooked is up but the projector is not showing what’s on your computer, it’s possible you’re in Extended display mode. On a Mac you’ll want to change this to “Mirror my display” in the Display settings. On a Windows PC you’ll want to select Duplicate Displays.


For other laptop issues, call the service desk for assistance – 617-353-4357
Document Camera Issues
1.) Make sure it’s plugged in and turned on (you’ll see a green light, the display will light up and you’ll hear it focus)
2.) Make sure HDMI is connected to the correct port on the Doc Cam and into the Wall or Rack port in the room and that the correct source is selected on the touch panel
3.) Make sure there is an object under the camera for it to focus on
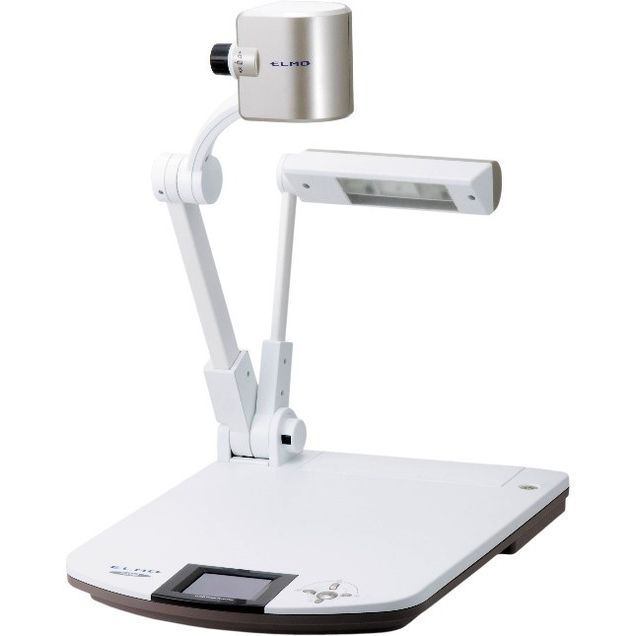
Figure 9. Document Camera
Using and Troubleshooting AirMedia
AirMedia is available in many rooms to be able to wirelessly present from your device. (Note: this option might not be available in your room)

Figure 10. AirMedia (Wireless Present) Option on a Touch Panel
- Make sure your device is connected to the BU Wi-Fi (eduroam)
- Make sure AirMedia/Wireless Present is selected on the touch panel
- Once selected, an image will appear on the projection screen that looks similar to this:
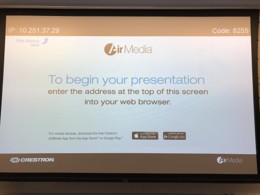
Figure 11. AirMedia Splash Page
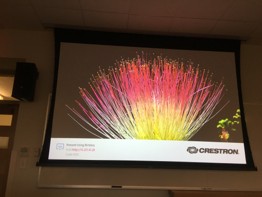
Figure 12. AirMedia Splash Page
4. On your device, open your browser of choice and type in the IP address shown on the screen in the address bar and hit enter.
***PLEASE NOTE: The IP address is different for each room. Make sure to copy down the address that is on the screen in your room. Also, the address is dot-placement-sensitive so be sure to copy the address as is on the screen.***

Figure 13. AirMedia Unique Room Address Circled

Figure 14. The same room address typed into a browser
5. Your browser will go to a webpage that will prompt you to enter a 4-digit access code. This code is found on the projection screen as shown below, enter it into the webpage prompt and press enter (each code is unique to the room and session):

Figure 15. Room Code circled
6. You may be prompted to download a temporary client to run. If so, choose the appropriate operating system


- If you are prompted to download the temporary client and install it, a warning window will pop up asking for you to allow it to gain access. Click on “Allow Access” and let the program run. It will prompt you to enter the code on the screen, enter the code.
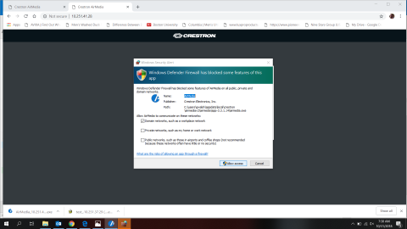
Your laptop display will now be shown on the projection screen. Whatever you see on your laptop screen will be shown through the projector.
If you’re using an Apple device and the previous steps didn’t work, try this process instead:
- Download and Install the AirMedia App:
- On your iOS device (iPhone or iPad), open the App Store.
- Search for "Crestron AirMedia" and download the app with the blue "A" icon.
- This app is necessary for establishing a connection between your device and the AirMedia receiver.
- Connect to the Appropriate Wi-Fi Network:
- Ensure your Apple device is connected to the same Wi-Fi network as the AirMedia receiver (eduroam)
- Obtain the AirMedia Receiver's IP Address and Code:
- Locate the IP address and a four-digit code displayed on the room's display screen or control panel.
- This information is typically shown when the AirMedia system is active and ready for connections.
- Establish the Connection:
- Open the AirMedia app on your iOS device.
- Enter the receiver's IP address in the app's designated field and tap "Go."
- When prompted, enter the four-digit code displayed earlier to authenticate the connection.
- Start Screen Mirroring:
- Access the Control Center on your iOS device by swiping down from the upper-right corner of the screen.
- Tap the "Screen Mirroring" icon.
- Select the AirMedia receiver from the list of available devices to begin mirroring your screen.
- Finalize the Setup:
- If you're in a classroom or conference room, unmute the projector or display system to share your screen with the audience.
- Ensure your device remains connected to the AirMedia app during the presentation to maintain the connection.
Other Classroom Issues:
Any requests regarding the temperature of the room (whether it’s too hot or too cold) should be directed to Facilities: Operations & Service Center (617-353-2105)