Upload Recordings to Media Gallery
Each Blackboard course has a Media Gallery which can store your recorded lectures. The following guide shows the recommended procedure.
Windows/macOS
- Log into learn.bu.edu and navigate to your course.
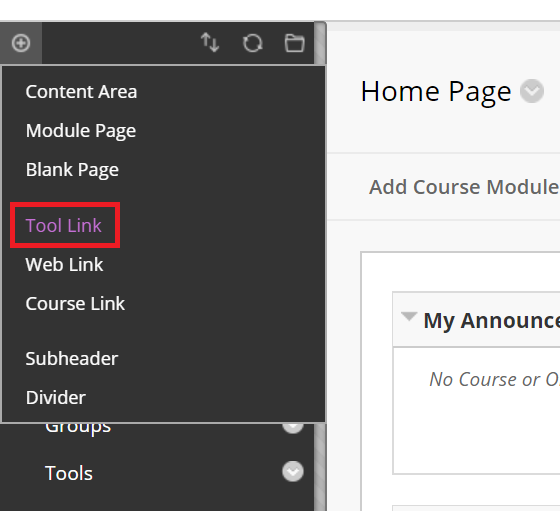
- In the upper left hand corner of the Course Menu, hover the circled plus sign.

- From the pop-up menu, select “Tool Link”
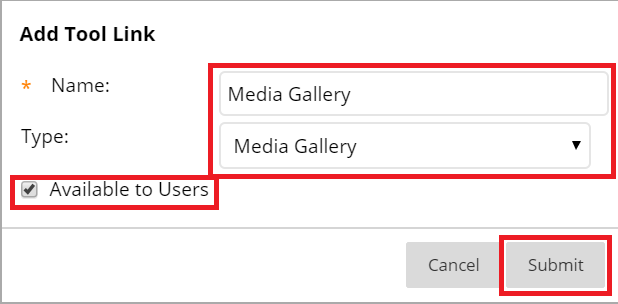
- Enter “Media Gallery” for “Name:“
- Select “Media Gallery” from the drop-down box.
- Check-off “Available to Users” and click “Submit”
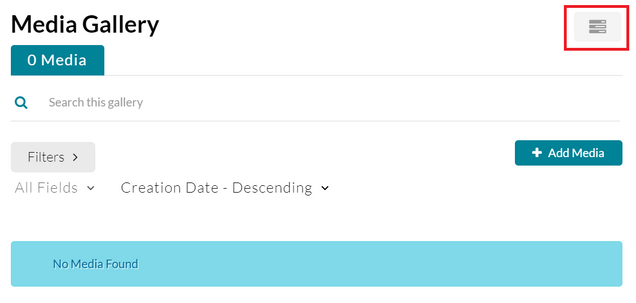
- Click on the newly created “Media Gallery” link in the Course Menu.

- Click on the menu in the upper right-hand corner.
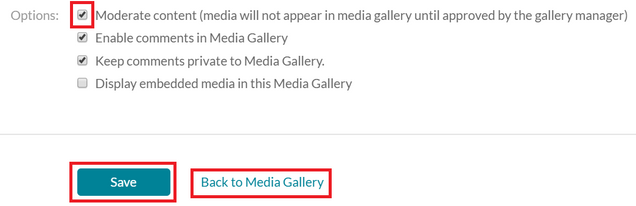
- Click on “Edit”

- At the bottom, check-off “Moderate content,” then click “Save” then click “Back to Media Gallery”
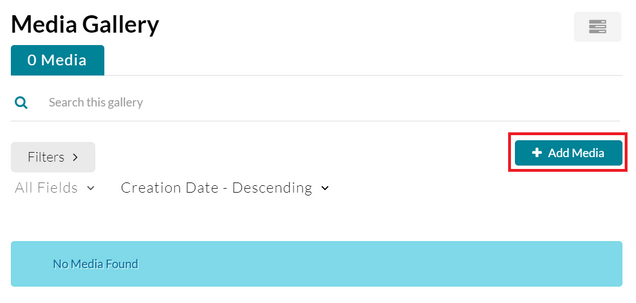
- Now click “+Add Media”
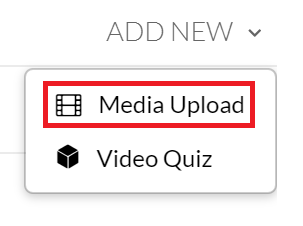
- On the Add Media page, click “ADD NEW”

- In the pop-up menu, click “Media Upload”
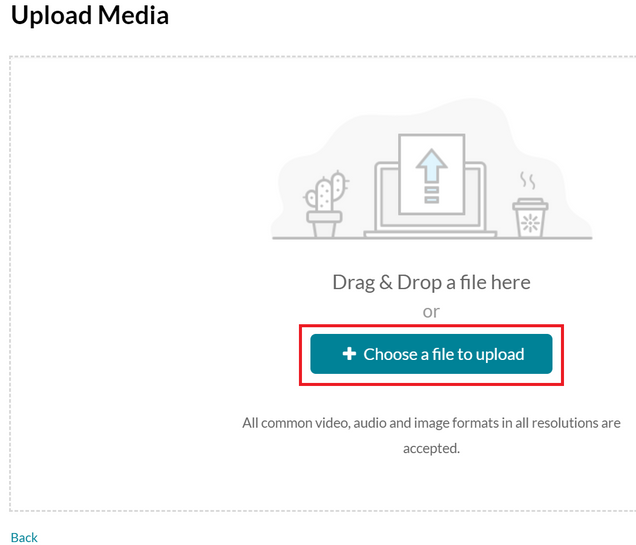
- Drag and drop a file into the designated area surrounded by the dotted line, or click the “+Choose a file to upload” button to navigate to a file to upload. In both Windows File Explorer and macOS Finder, locally saved recordings will be in:
Documents -> Zoom -> [CourseFolderName]
- Rename the .mp4 file before uploading. It is strongly recommended to stick to the following naming convention or similar, year first, so the videos will sort in a meaningful way within the Media Gallery:
- ME500_20-01-21.mp4
- When the upload has finished, scroll down and click “Save” then “Go To Media Gallery”

- The video will need to process for a while (at least an hour for a normal class) before it will be available.
- In the Course Menu on the left, click the down arrow to the right of “Media Gallery” and click, “Show Link” When you are ready for students to see the uploaded videos.
