Add Printer to Windows
This page includes instructions for adding printers to computers running the Windows Operating system. There are two cases; Computers joined to AD should add printers via the eng-printers server. Computers not joined to AD should add printers directly. Printer information is listed by dept:
Add Printer via eng-printers
If your computer is joined to Active Directory (AD) and you login with your BU account, you can quickly connect a printer to your system. Note Laptops are seldom on AD.
Details:
-
Open a Run Dialog box. A nice keyboard shortcut to do this is Win + R.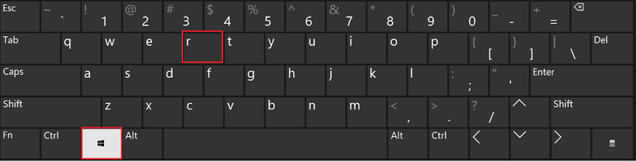
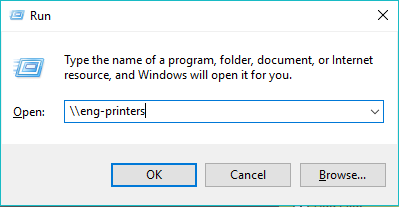
- Enter \\eng-printers into the Run dialog box and click OK.
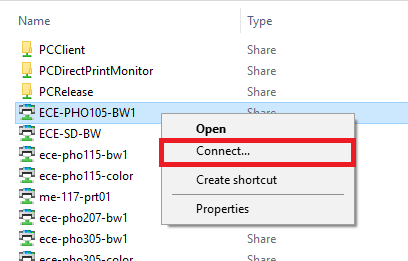
- Right click on the printer you want to add and select Connect.
- A new window will open briefly showing the progress of installing the Printer. Once it disappears the printer will be installed.
Note: If you are prompted for a username and password it means your are not logged in with your BU account. To proceed with you will need to enter your BU credentials; “ad\yourBUusername” (the “ad\” is very important!) and your normal Kerberos password. Expect to lose the connection to the print server occasionally. When that happens you’ll need to re-add the printer.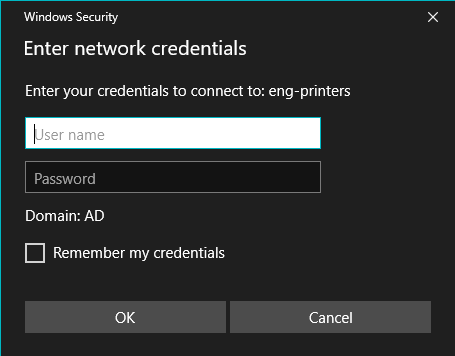
Add Printer Directly
You may choose to print directly to a network printer if your Windows system is not joined to AD Domain or you log into a local account.
1. Download and extract print driver to a local drive. We recommend installing a Postscript driver. You can download the most recent drivers from the manufacturer’s website:
- For example, the Ricoh Drivers can be found here:
2. Next add a TCP/IP port:
- From ‘Start’ menu: ‘Devices’ > ‘Printers & Scanners’ (Win 10) or ‘Bluetooth & devices’ (Win 11)
- Select ‘Add a printer or scanner’ (Win 10) or ‘Add device’ (Win 11)
- A very long list of printers will populate.
- Scroll to the end of that list but before currently installed printers, click ‘The printer that I want isn’t listed’ (Win 10) or ‘Add manually’ (Win 11)
- In the box that opens, select the option ‘Add a printer using an IP address or hostname’
- For Device type select ‘TCP/IP Device’
- Enter the printer’s IP Address. (listed by department or provided by ENGIT)
- Complete the wizard.
3. Install the driver:
- At the ‘Install Printer Software’ click the ‘Have Disk..’ button
- In the box labeled ‘Copy manufacture’s files from:’ use the directory you extracted the driver to (e.g. C:\tmp).
- click ‘OK’
- Select the appropriate Print driver
- Name the printer whatever you like
- Print a test page, and don’t share it
Additional Methods
Add Printer via Active Directory
Generally avoid this method, in favor of the previous method, as some printers are not accessible using ‘Add Printer’:
-
In Windows 7 open the “Printers & Faxes” under the start menu or the control panel. In Windows 10 type “Devices and Printers” in the search box beside the Start menu.
- Choose “Add a printer”, select the network printer option, and then the “Find a printer in the directory” option.
- Search for printer names (e.g. BME- DIV- ENG- ECE- ME-, etc.)
-
Right click on the printer you want to add and select Connect.
Add Printer via LPR on Windows
In some situations we may ask you to install a printer via an LPR port
- Make sure the LPR Port Monitor is present, and add it if it’s not
- Go to Control Panel/Programs and Features
- Click ‘Turn Windows features on or off’, and expand ‘Print and Document Services’
- Check the ‘LPR Port Monitor box’, and click OK
- From the Start menu, select ‘Devices and Printers’
- Click ‘Add a printer’ then ‘Add a local printer’
- Choose ‘Create a new port’, then select ‘LPR Port’, and click ‘Next’
- Enter the server name, eng-printers.bu.edu, and queue name (e.g. ECE-PHO321-MPC6501), and click ‘OK’
- Add the appropriate printer driver and name the printer.
Adding finisher options for Ricoh printers
- Right-click printer then select printer properties
- Go to ‘Device Settings’ tab
- Scroll down to ‘Installable Options’ and next to ‘Finisher’, change ‘Not Installed’ to ‘Finisher SR4030’
Here’s another post with picture:
Known Issues
A number of drivers won’t play nice when trying to do a “point and print” installation from the print server. We’ve seen this with “HP Universal Printing PS” in particular, where trying to add a printer gives 0x0000007e or another cryptic error code.