Add Printer to macOS
This page includes instructions for adding printers to computers running the macOS operating system. There are two main methods for adding printers, via the eng-printers server, or directly. Printer information is listed by dept:
Add Printer via eng-printers
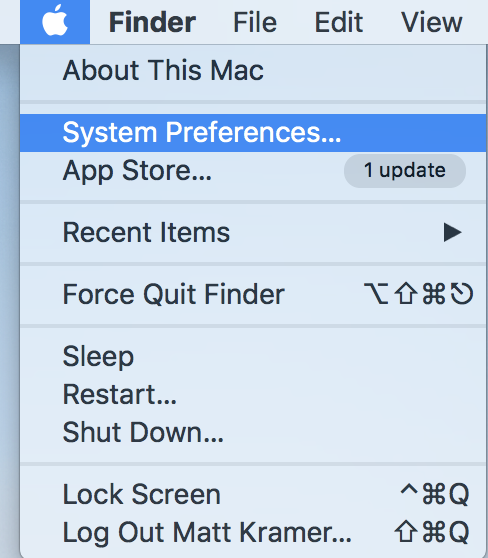
- Open System Preferences by clicking on the Apple Icon, and select System Preferences.
-
In System Preferences, select Printers & Scanners.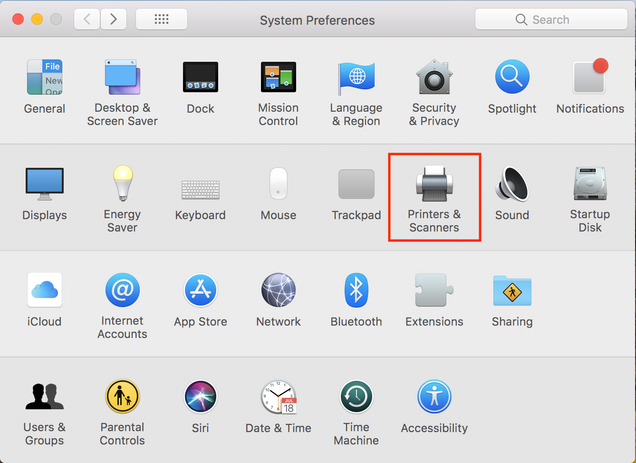
-
Click the [+] below the printer list, then Add Printer or Scanner…
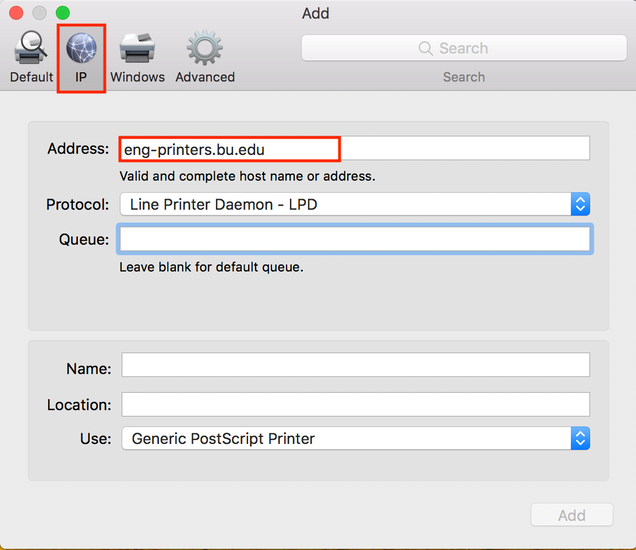
- In the popup Add printer window:
- Choose the IP option
- In ‘Address:’ enter eng-printers.bu.edu
- In ‘Protocol:’ select Line Printer Daemon – LPD
- In ‘Queue:’ enter the Queue Name (listed by department)
- In ‘Use:’ select print driver and features to match the hardware. Mac OS comes with many drivers, but you’ll likely need to download the specific driver for your printer. If so you should also consult their instructions.
Add Printer Directly
-
In System Preferences, select “Print & Scan” or “Print & Fax” in older versions of Mac OS.
-
Click the [+] to the printer.
- In the popup ‘Add Printer’ box:
- Choose the IP option
- Select the Protocol you want to use. LPD will print without needing authentication, while SMB connections will prompt for username/password for the AD domain.
- In ‘Address:’ enter the IP address of the Printer (listed by department)
- Leave ‘Queue’ blank
- In ‘Print Using:’ select print driver and features to match the hardware. Mac OS comes with many drivers, but you’ll likely need to download the specific driver for your printer. If so you should also consult their instructions.
Additional Method
- lpd://eng-printers/sharename
- smb://ad/eng-printers/sharename
- Detailed instructions for SMB printing with per-version steps:
-
http://computing.physics.harvard.edu/macosx_samba_print
-
Note the bit about adding the “Advanced” button on the toolbar! Also, even though ad is specified in the URL, be sure to use ad\username when the authentication window opens up. For an alternative method, the web interface should also be running on http://localhost:631 just as it is for Linux computers.