Using VMware Horizon Client
CAS Information Technology hosts a virtual desktop for COM students who are taking FT 508 – Line Producing which provides access to specialized software. Connections to this virtual desktop are made using the VMware Horizon Client. Full instructions on how to install VMware Horizon and connect to the virtual desktop are available on the CAS IT page here – https://www.bu.edu/casit/information/vdi-virtual-desktops/ .
Sharing Local Files with the Virtual Desktop
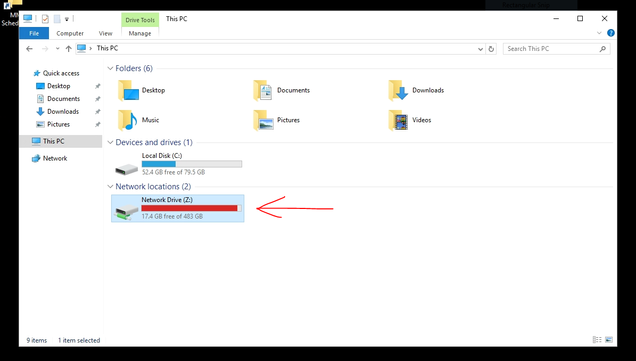
The VMware Horizon Client will ask if you want to enable file sharing between your local machine and the virtual desktop when you first run the program. If you clicked to enable this feature, your local user folder and/or USB drive will show up on the virtual desktop as a Network Drive under My PC as shown in the screenshot below.
If you do not see your local machine user folder listed under Network Locations, you must enable folder sharing in the VMware Horizon Client settings. See the instructions below for both MAC and Windows.
Enable Folder Sharing on MAC
- If off campus, first connect to the BU VPN then open the VMware Horizon Client
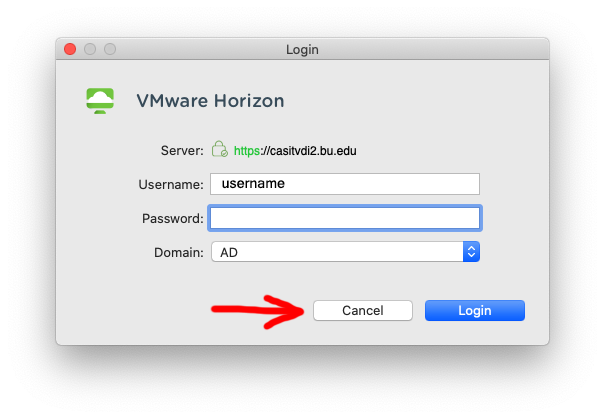
- If Auto Connect is enabled and you are prompted to log in, click Cancel
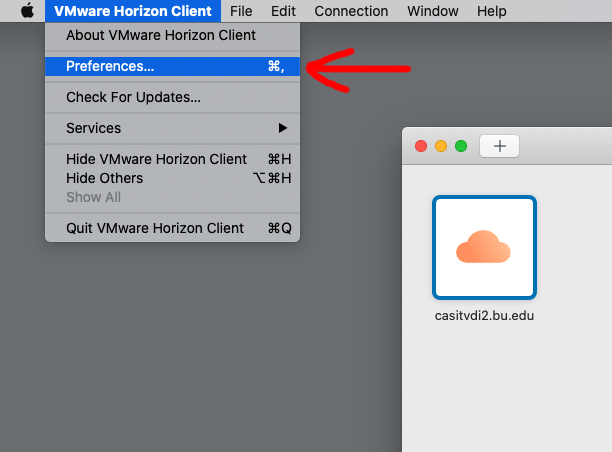
- In the top menu bar, click VMware Horizon Client and then Preferences
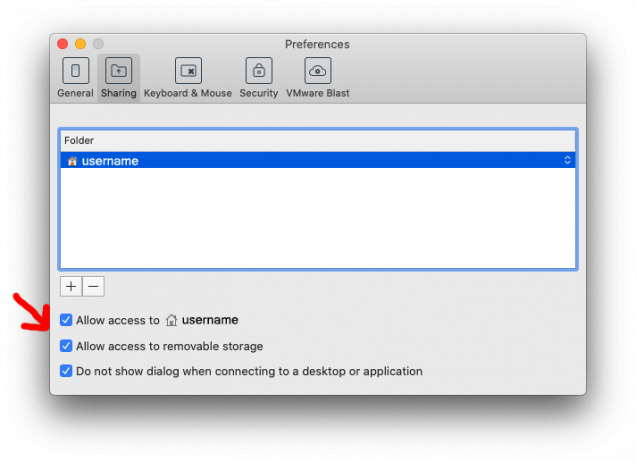
- Click the Sharing tab and then check the box for Allow access to username and/or Allow access to removable storage (USB drives). Your local user folder should appear under the folder list.
- Close the window and double click the casvdi2.bu.edu icon to connect to the virtual desktop. Your local user folder and/or USB drives should appear on the virtual desktop under My PC – Network Locations
Enable Folder Sharing on Windows
- If off campus, first connect to the BU VPN then open the VMware Horizon Client
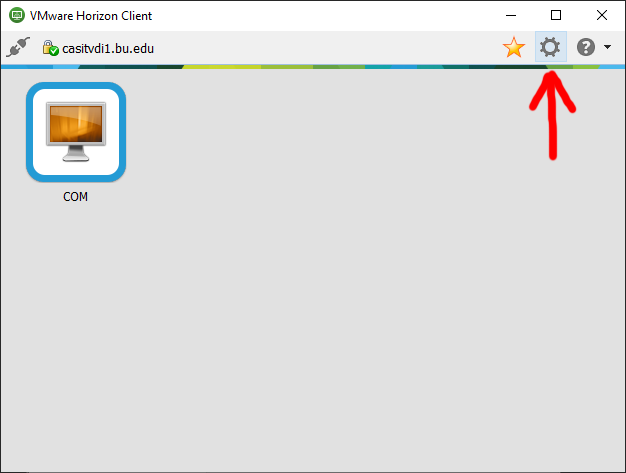
- Double click the casvdi2.bu.edu icon and login with your BU credentials
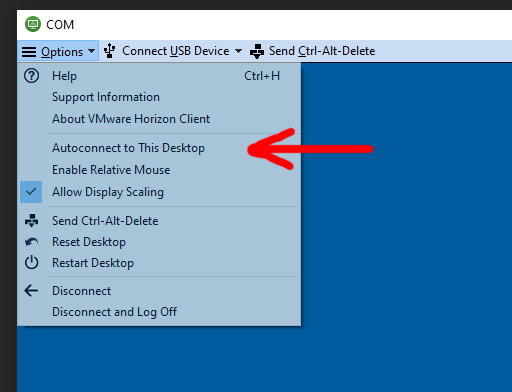
- If the COM VM is set to connect automatically and you go right into the remote windows desktop, click the Options button in the top menu bar and uncheck Autoconnect to This Desktop. Log off and then follow these steps again to login and display the VM select screen with COM listed.
- On the virtual machine selection screen, click the gear icon in the top right to access the settings
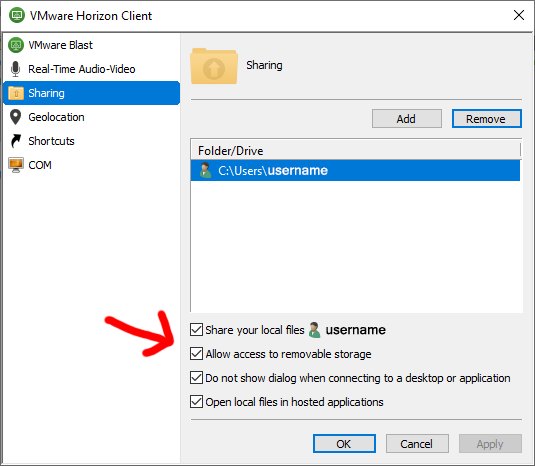
- Click the Sharing tab and then check the box for Share your local files username and/or Allow access to removable storage (USB drives). Your local user folder should appear under the folder list.
- Close the window and double click the casvdi2.bu.edu icon to connect to the virtual desktop. Your local user folder and/or USB drives should appear on the virtual desktop under My PC – Network Locations