Processing Dell Evidence File in EnCase
MET CJ710 Virtual Lab Topics
Instructions
1) Connect to the CJ710 Virtual Lab.
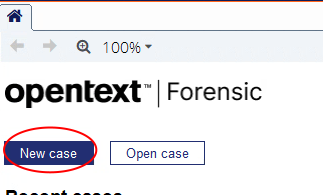
2) Open EnCase from the desktop and select New Case.
3) On the “Options” window, make the following changes:
- Enter a name for your case in the “Name” field
- Uncheck the “Use base case folder for primary evidence cache” option
- Uncheck the “Backup every” option
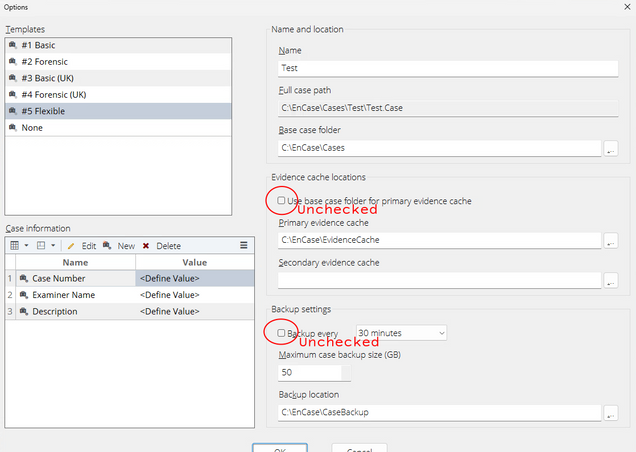
- Click OK; if you get a window asking “Disable Backup?”, choose Yes.
4) From the case window Select Add Evidence.

5) Select Add “Evidence File”.

6) Scroll down and open the “EvidenceFiles” folder.

7) Double click the “4Dell Latitude CPi” file.

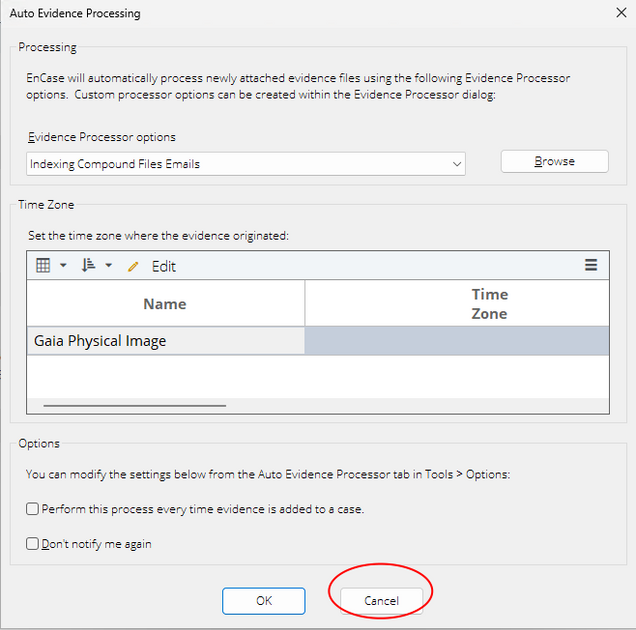
8) Click Process Evidence > Process.

Note: If you get an “Auto Evidence processing” window, click on cancel to continue to the next screen
9) In the processor options window:
- Uncheck the “Social Media parser” option
- Uncheck all the options inside the “Modules” folder

- Click OK to continue
10) While the file is processing, double click on the bottom right corner to get a detailed progress bar.


11) When the process is finished it will show status “Complete”.

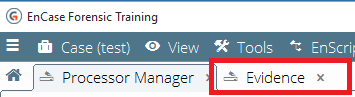
12) Click on the “Evidence” tab to go back.
When you exit the Virtual Labs, this case will be deleted. To avoid doing all these steps again, you can open a preprocessed evidence file by following the steps in the Open Mr_Evil Case with Processed Evidence instructions.