Cisco VoIP Agent Phone Training
Instructions for Softphone
Logging in to Webex
- Open the Webex application on the office computer.
- Sign in with your BU Kerberos credentials.
- Approve the Duo 2FA request.
- If this is the first time you are signing into Webex on this computer, you will receive a message saying Phone Services are Disconnected. Click that error message or navigate to Preferences > Phone services to enter your BU login and password again. In future sessions, you will not need to provide this second login.
Configuring MyE911
Configuring MyE911 is required when using Webex to provide accurate location information in the event of a 911 call. This app is already installed on the computers in the office. Follow the instructions on the links below to configure the applications and location data.
[tw_button text=’Windows’ link=’https://www.bu.edu/tech/services/cccs/phone/linesequip/softphone/getting-started-with-mye911-windows/’ arrow=true color=’green’ icon=’windows’]
[tw_button text=’macOS’ link=’https://www.bu.edu/tech/services/cccs/phone/linesequip/softphone/getting-started-with-mye911-mac/’ arrow=true color=’blue’ icon=’apple’]
Instructions for Physical/Desk Phone
You MUST create your phone PIN before anything else
Before logging in to the phones for the first time please do the following:
- Log in to the Self Care Portal using your BU login name and Kerberos password.
- Choose the General Settings tab.
- In the Phone Services PIN section please create the Pin number that you will use to log in to your phone (from 4-128 numbers), and chose “Save”.
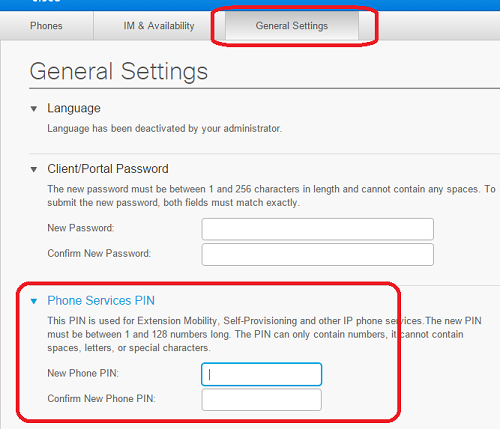
- It may be helpful to make your pin your previous ACD login code to remember it more easily
- You may now log out of the Self Care Portal.
*PLEASE NOTE: You will only need to log into the “Self Care Portal” once in order to create your new phone PIN. The sections below outline what you’ll do during your shifts.
Logging in to your VoIP phone
Every time you begin your shift you must log in to the phone at your desk. Please follow the steps below to do so:
- From your phone please choose the “Settings” gear. This will open up the Applications menu.
- The shortcut for “Extension Mobility” might be 4 or 6 depending on how the phone was set up, scroll down to find “Extension Mobility”. You can use the shortcut number next time you sign into this particular phone.
- If you then see the option to logout, with a login name that is not your own, please choose the “Yes” softkey to sign out the previous user.
- You will be prompted to enter your User ID (BU login name) and the Pin that you created via the Self Care portal (first section of this page above). For User ID, you enter letters/numbers via T9 like on old cell phones. Press 7 four times to enter the letter ‘s’, then press 3 once to enter ‘d’, press 3 four times if you need to enter ‘3’. When entering the pin, the number pad is just a regular number pad, not T9 anymore, so pressing 1234 will enter 1234.
- Then you can just hit the “Submit” softkey.
- You should see the text “Login successful” and “Resetting … Please wait”.
- Once the “reset” screen disappears you have fully logged in to your VOIP phone.
Cisco Finesse
Logging in to the Agent Portal
- Before you can being taking calls you must also log in to the Agent Portal using your BU login name, your Kerberos password, and your extension (the extension that appears on your phone after you have successfully logged in).
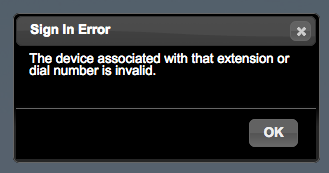
- If you receive the below error when logging in to the Agent Portal it means that you have not properly logged in to the VOIP phone, or that another user is logged in to your VOIP phone. Please log in to your VOIP phone using the above steps and try again.
Using the Agent Portal
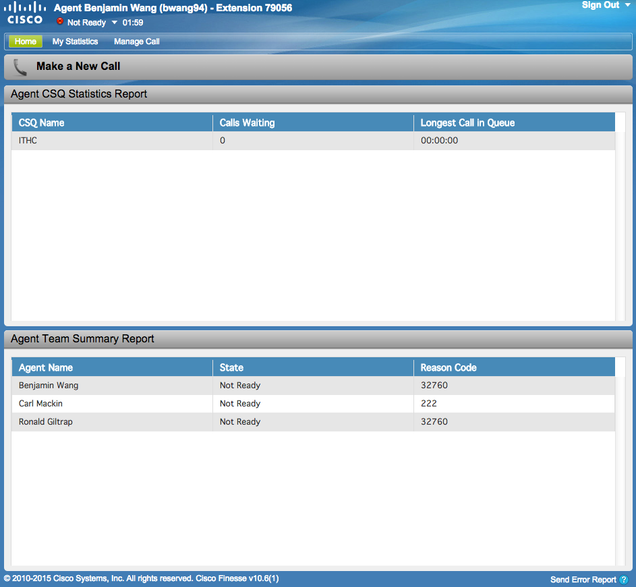
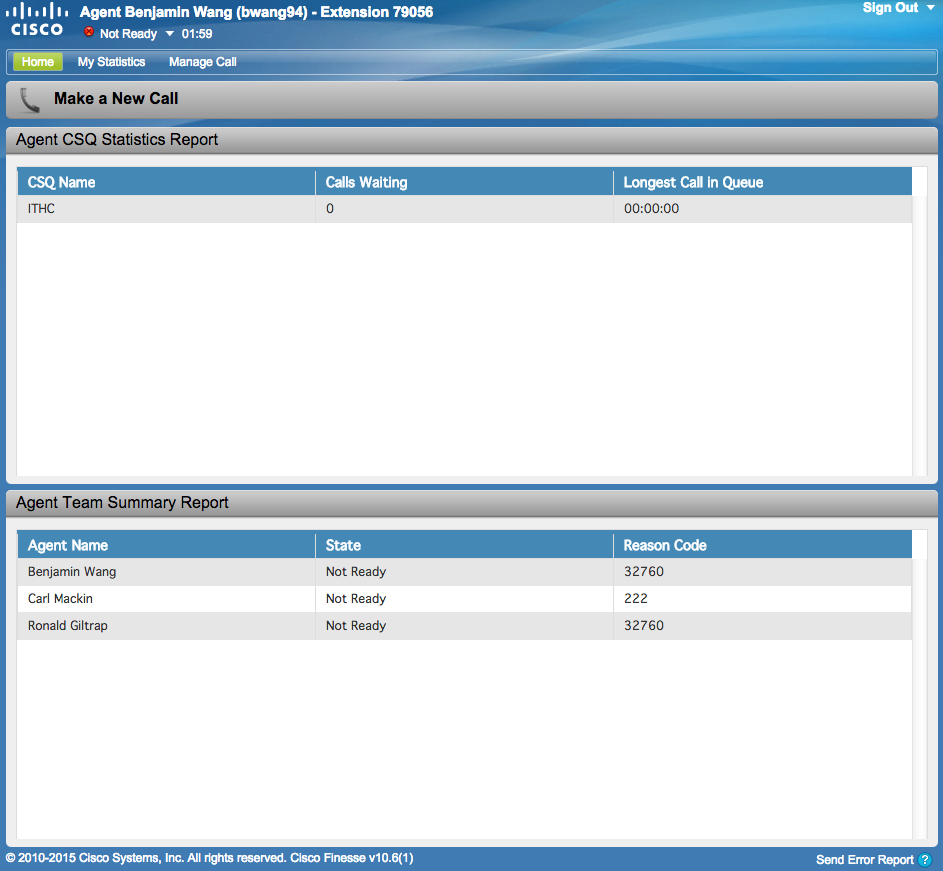
- Once you have successfully logged in you will be automatically set to a “Not Ready” state and be directed to the the Agent Home Screen.
- From this screen you will be able to see the total number of calls waiting in the queue, as well as the other agents logged in and their availability.
- When you are ready to take calls you will need to change your status to “Ready” from the drop-down menu. When you complete a call with a client you will be put in to a “Wrap-up” state for 30 seconds then placed back in to the “ready” state to take calls again
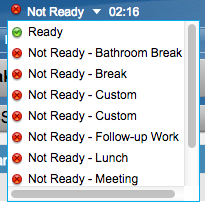
- If you need to step away from your desk, or need to be unavailable for calls, choose the appropriate “Not Ready” code from the drop-down menu. You can also choose an appropriate “Not Ready” code while on the phone with a client, this way if you need to do extra work on the ticket after hanging up you will avoid having to rush and choose “Not Ready”.
- If you wish to choose “Not Ready” when a call is coming in to your phone you can either change the status from the drop-down menu in the Agent Portal, or you can choose the “Decline” soft key on your phone. Please try and use the Agent Portal whenever possible so that you can see that other staff members are available to take the call.
- At the end of your shift: You absolutely MUST put your phone in a “Not Ready” state before signing out of the Agent Portal (please do not just close out of your browser). The only way you can sign out of the Agent Portal is if your phone is in a “Not Ready” state, otherwise you will see this message:
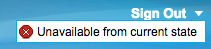
If you are on the phone with a client and you shift is ending you MUST put your phone in the “Not Ready” state before completing the call. If you are in a rush to get to class and do happen to just close out of your browser after finishing your call you will still remain logged in to the phone system as “Ready” for three minutes until it kicks you out. By putting your phone in the “Not Ready” before finishing up with the client you will at least be unavailable for calls if you wind up closing the browser and remaining logged in for the three minutes.- Once you have logged out of the browser you can log out of your phones by going to settings on the phone, choosing option 4 “Extension Mobility”, and then the “logout” soft key.
*IMPORTANT* Handling Incoming Voice Message Calls
Clients are now given the option to leave us a message instead of waiting in the queue. These messages MUST be handled in a certain way or they will continue to loop through the service desk:
- You will receive a pre-recorded call that states you have an incoming voice message and that you can press any key to listen.
- When you finish listening to the voice message you will be given two options
- Press 1 to listen to the message again: You can do this as many times as you like
- Press 2 to call the client back: You MUST choose this option, even if the client requests that you do not call them back.
- If you just hang up on the call, without choosing option 2 to call the client back, then the call will loop through the service desk.
- Even if you hang up and call the client back separately, that voice message call will still loop through the service desk until someone chooses to “press 2” and call the client back.
- We cannot stress enough, do not simply hang up the voice message, you MUST “press 2” to call the client back.
- If your client does not answer please leave a voice message letting them know you are returning their call and give them our callback number (617-353-4357). If you were able to obtain their login name as well you can let them know we will create a ticket for them and that they can also simply reply to that ticket.
- If your client does not answer and they specifically requested not to be called back you do not need to leave a voice message.
Helpful Phone Tips
Here are some helpful tips for various scenarios you may encounter using your VOIP phone:
- Transferring Calls: Select the conference button
 and dial the extension you would like to reach. Once you have spoken to the client on that end of the line and determined they are available to call simply press the conference button again to join the two callers. Once you have joined the callers if you no longer need to be on the line simply choose the “End Call” soft key.
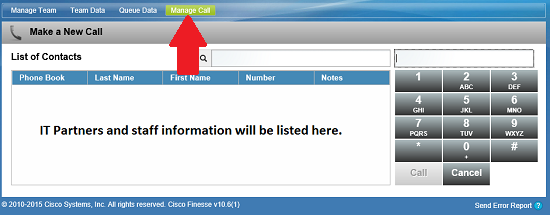
 - IT Partners are listed in the Agent Portal. You can conference with these departments while on a call by going to the “Manage Call” tab, clicking on the “Consult” icon and choosing the appropriate IT Partner from the list.
- If you are not on a call you can still go to the “manage Call” tab and choose “Make a New Call”
- The handset will flash red when you are getting an incoming call, so if you see the handset flashing and do not hear anything ringing your volume is likely down. Please answer the call or pass it along and then raise the volume on your receiver.
- If you do not pick up a call after three rings the Agent Portal will move your status to “Not Ready” and force the call to either the next available agent or to the voicemail options.