To use a custom graphic or background for any of the screens in Studio West, download the image to either the Producer station desktop or one of the two Playback computers. Then click “Choose File” select the image, and then “Upload File."

 The graphics page sorts all of the uploaded files alphabetically. Scroll through the page to find a specific image or video. Assign it to “GFX 1” or GFX 2” by clicking on either of the “Set GFX” links below your preferred image. (See left.)
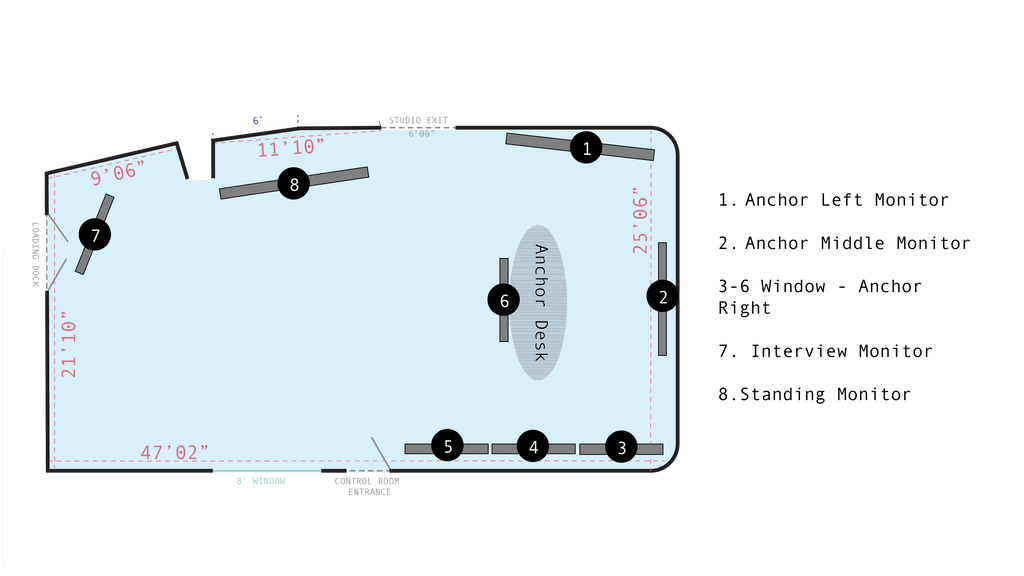
To display the image, move over to the tech director station to navigate through the Control Board Touch Screen to select sources for each in-studio screen—as shown in the image below.
Simply tap the name of the screen you want to change the display of, it will then display a long list of sources (identical to those listed on the control board). Feel free to upload something custom or use the stock images in GFX 1/2 or the lawn cam for some live ambience.

Setting Up the Playback System:
Our playback computers are frequently used during live broadcasts to play packages, ad breaks or display images that enhance the story being told. Whatever media you decide to include, Studio West’s playback system is built to be a one-stop shop.
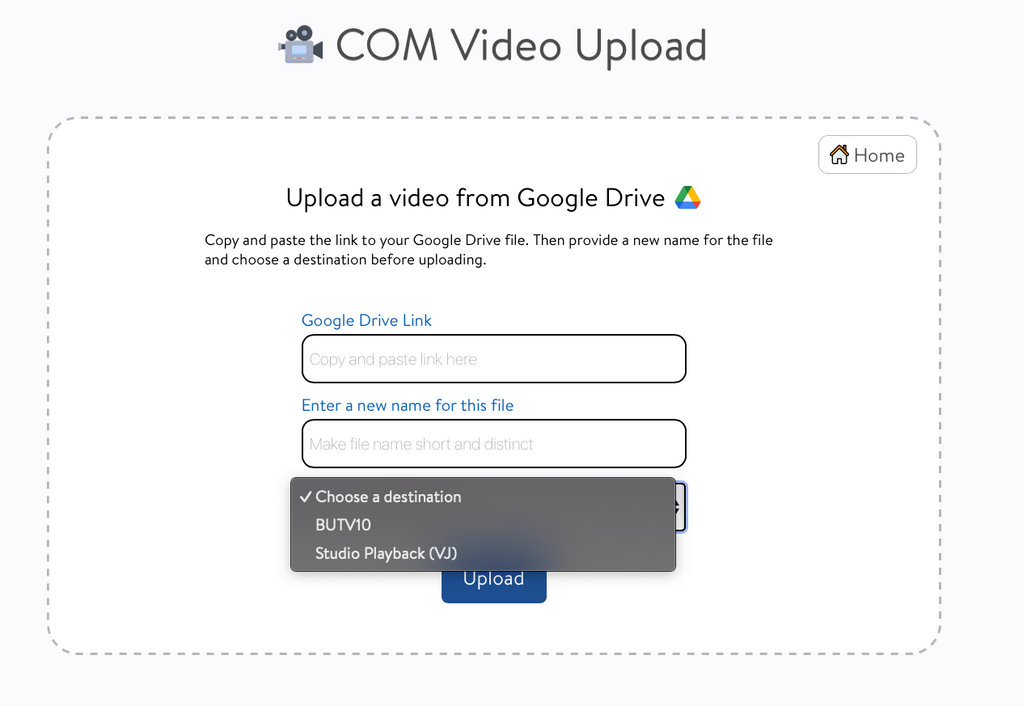
Before starting make sure the broadcast’s script has been finalized in rundown creator to guide the order of each package/media file. All the external media needs to be temporarily uploaded to a folder in Google Drive or consolidated to a single folder on a local computer. After that, visit comvideo.bu.edu and select the option to upload from Google Drive or directly from the computer. (Paste the link provided by Google to “share” the file or folder and then name it.) Next, select Studio Playback VJ and the rundown that matches your script.
Make sure that two apps are running. Open the media player and in the upper left hand corner navigate to “File” then “New Folder-Based Playlist.” To locate the relevant rundown playlist folder go to “Video” (under the locations tab in finder). There should be a folder with the same name as your rundown. Once that folder is selected, your playlist should open automatically in the media player!
Using the Playback System:
 Before the recording session starts, check in with the producer or director that the order of the clips in your “playlist” is correct. This helps circumvent any panic or communication problems if last minute changes were made to the order of the show. Remember to also speak with the audio engineer so they know where in the script to turn on playback audio and whether or not they also need to mute the anchors’ microphones.
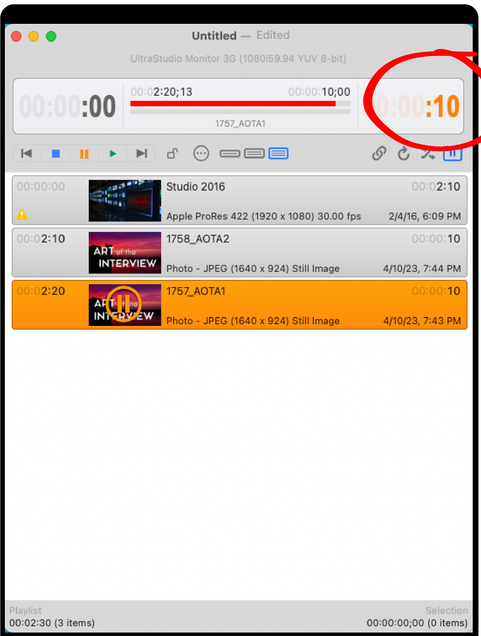
At the start of the show, double click to select the first clip. If ever a clips tarts playing at the wrong time, double click the clip again to jump back to the beginning. Tapping the spacebar plays and pauses the selected clip. Any still images will be set to play for ten seconds by default. The circled number in the figure to the left is the countdown—it denotes how much time is left in the clip. Loudly and clearly communicate to the producer, audio engineer and camera operators how much time is left in a package by counting major milestones out loud as well as the final ten seconds.