Several classrooms across campus now have the capability to capture and publish Echo360 recordings using the podium computer and classroom microphone.
To get started:
Step 1: Request an Echo360 account
- If you do not have an account on Echo360, fill out the Echo360 capture request form. A ticket will then be assigned to the appropriate group and your account will be created.
- Once you have your account, log in at https://echo360.org to ensure your account username and password allow you to login.
Step 2: Request a new course or section for your recording
Before you start a capture, you’ll need a place for the Echo to be sent to once it has finished recording. If you do not already have a course for the current semester, you can request a new course or section by completing the capture request form
Step 3: Record your lecture
- Log in to the podium PC
- On the desktop, select the Echo360 Software Capture icon:

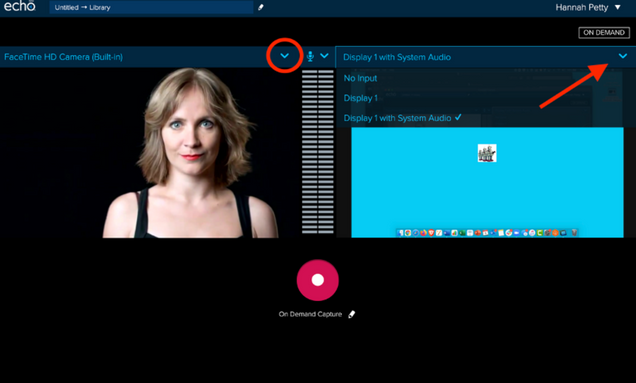
If the icon is not present on the desktop, you can use the start menu to search for the program - When the Universal Capture window appears, notice that the default inputs are showing in each of the panels, along with an audio (VU) meter in the center.

- Use the Input drop-down lists to select different inputs for each panel – selecting None if you don’t want one or either of them (e.g., display only, video only, or audio only – for audio, select Mute only if you are capturing System Audio with a Display input).
- Click the capture title in the top left corner or capture type below the Record button, identified in the below figure to open the Capture Details page.
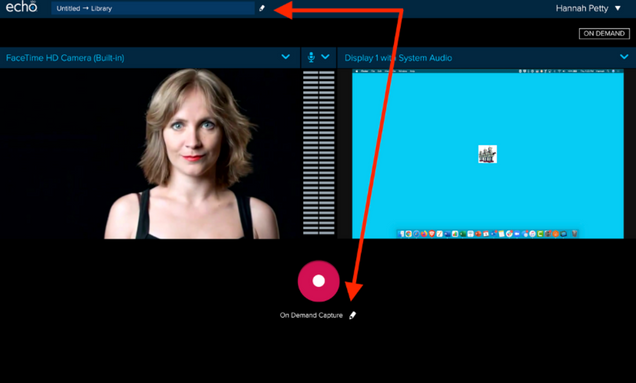
- The Capture Details page appears, containing fields and configuration options as described below the figure.

- Enter a Title for the capture. This name will be the name of the recording. If you select to publish the capture to a new class, it will also be the name of the class.
- Description and Tags are optional fields. Complete them if desired.
-
If applicable, enter a Capture Duration for the capture. The default is 60 minutes (1 hour). You can edit this to be more or less. Also, note that the date/time of the next scheduled capture appears below the Duration box.
- Select a Publish To location, identifying where you want the capture to be published when it is finished. The drop-down list will include your Library and any currently active sections you are enrolled in.
- Select a Class option. If you have selected an active course/section to publish to, you will then be able to choose to either create a new class or publish to a pre-existing class. If publishing to a NEW class, the class name will match the title given for the capture.
- When finished, click SAVE.
- You are returned to the main preview page. Take this opportunity to confirm or change your input selections if needed.

- When you are ready to launch the capture, click the red Record button in the center of the screen, identified in the above figure.
- You will see a short countdown. When it finishes, your recording will start. The capture will continue for the duration you set until you click the Stop button, OR until the next scheduled capture for that room/device is set to begin. If you attempt to set the duration of your capture beyond the start time of the next scheduled capture, you will receive a warning notifying you of the conflict.


A full set of instructions for controlling Echo360 Classroom Capture is available here
Step 4: View and distribute your lecture
-
- You should receive an email after the recording has been captured and processed. Please keep in mind that processing time can vary depending on time of day, length of recording, and other factors.
- After you receive the email, you can see your Course Portal which contains all of your existing lectures by logging in at https://echo360.org
If you need help creating a link to your Echo360 content in Blackboard, please contact us at ithelp@bu.edu.