The Profiles plugin lets you create and display Profiles, which are special posts that contain information about faculty or staff.

A sample Profile, in the single Profile view.
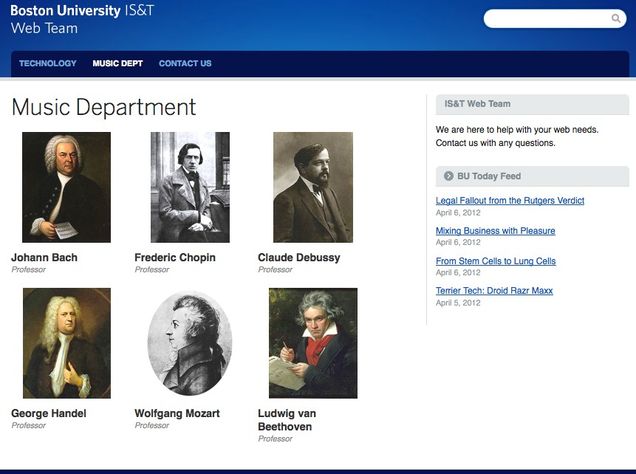
Profile lists can be easily displayed on any WordPress page or post.
Profile Administration
Profiles are available on all standard BU WordPress sites that use a Responsive Framework theme. For most sites, the plugin will not be turned on. Submit a ticket to request that we activate Profiles for your site.
Once the plugin is activated, a new Profiles section will appear in your WordPress Dashboard.
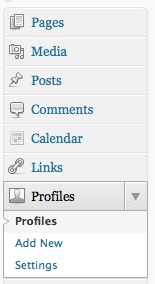
Viewing, editing, and creating Profiles is largely the same as creating pages. You can use the standard content editor to enter biographical information about the person, which will appear beneath the person’s details in the single Profile view. Be sure to enter the person’s full name in the Title field, as this will generate the permalink for the Profile. Or, you can use the First and Last Name fields in the Profile Details metabox (pictured below) to automatically generate the Title. You can enter additional information in Profile Details as indicated.

Enter the person’s name, title, education, office, email address, and phone number. First and last name are required; any other fields you don’t complete will not be displayed on the page. The email address will be automatically converted to a clickable link.
If your site has the Post Details plugin activated, there will be a box below the Profile Details section that allows you to attach a thumbnail image. These thumbnail images will display along with any profile information. If you do not have the Post Details plugin, you may submit a ticket to request that we activate it.
Profile Settings
On the Settings page for Profiles, you can configure how your site handles individual profile pages and the primary listing of all profiles.

Settings for your primary listing of Profiles.
By default, your site will have a listing of all your Profiles located at http://www.bu.edu/yoursite/profiles. Click the View button to see what this listing looks like. You can change the profile’s URL by entering a new slug in this field.
If you prefer, you can display your profile listing on an existing page of your site. This gives you greater control over the formatting of the list and its placement on your site. Check Use an existing page and a drop-down menu of pages appears.

Select the page on which you intend to display your Profile listing. Choosing this option does not actually place the listing on the page you selected. To display the listing you must either add the Profiles shortcode to your page, or set your page’s template to the Profiles template. Both approaches are detailed below.
The View button disappears when you change the location options. To view the profile listing page you have selected, first save your changes.

Settings for single Profile display.
You can also change the URL configuration for single Profiles. By default, single profiles are located at http://www.bu.edu/yoursite/profile/jane-doe, where “Jane Doe” is the profile title. Edit the slug in this field if you wish to substitute a different term for “profile” in the URL.
A single Profile displays a link to your primary Profile listing (regardless of where you choose to display that primary listing). Here you can edit the text of that link.
Profile Sidebar
The Profiles plugin adds a new sidebar to your site. This sidebar is displayed on single Profiles, on the built-in primary Profile listing, and on any page that uses the Profiles template. This sidebar appears alongside the other sidebars on the Widgets page.
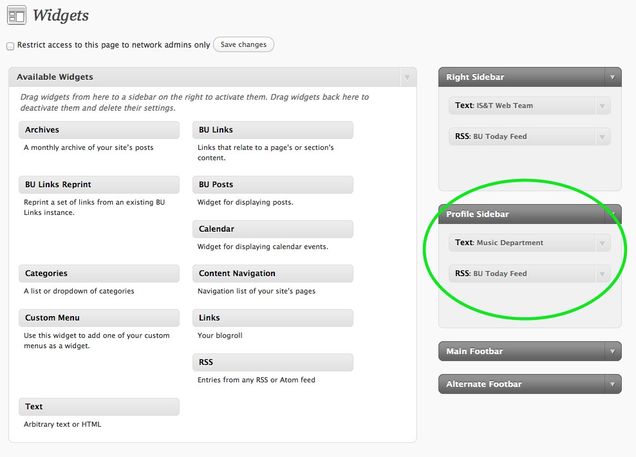
You can choose to display the same widgets in the Profiles sidebar as in your standard sidebar, or you can add different widgets that might better suit your Profiles.
Using Profiles
Single View
A Profile can be treated much like any other page in WordPress. The person’s details will appear (along with a thumbnail image if one has been attached) at the top of the page. The content you enter will appear beneath. Your Profiles sidebar will appear on the side.
List View – Page Template
One way to display a list of your Profiles on a page is to assign that page the Profiles page template. The page template box is on the right side of the Edit Page screen, just under the Publish/Update button.
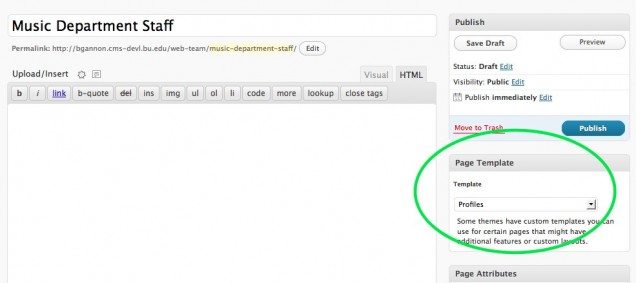
Select Profiles and save your changes. Now you will see a new box above this in which you can specify the format of the profile listing.

The format selector appears after you select the “Profiles” page template and save.
Samples of the three formats can be seen below. Once you have selected this page template, the page will display your Profiles in the format you choose, below any content you enter for the page. Leave the content editor empty to just display the Profile listing.
List View – Shortcode
A list of your Profiles can easily be added to a page or post with a single line. You can also specify how the lists should be formatted.
Profile lists are added with a shortcode (a special term between brackets that WordPress recognizes and converts into content). The basic shortcode for a Profile list is:
[bu_list_profiles]
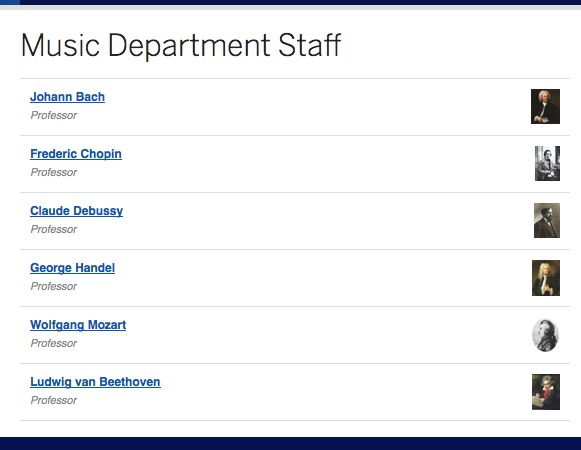
This displays profiles using the default format, a simple list of links:

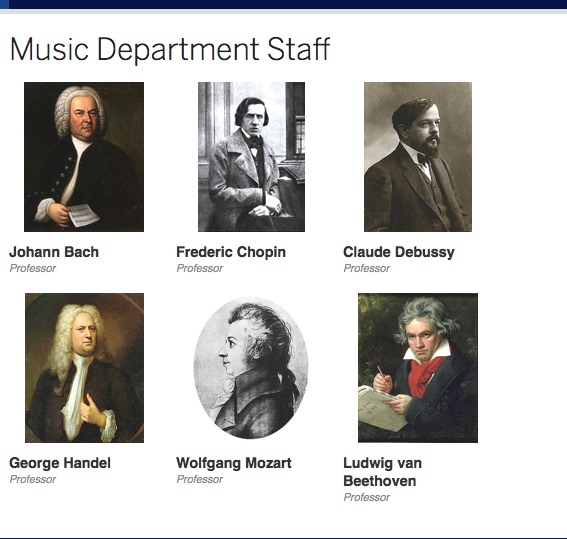
The shortcode allows you to specify other formats. Currently, the two layouts available are basic and advanced:
[bu_list_profiles format="basic"]
[bu_list_profiles format="advanced"]
The shortcode also lets you exclude specific Profiles or specify which profiles should be shown. To exclude or include a Profile, you will need to know its ID. To get the ID of a Profile:
- Go to the Profiles page in the WordPress Dashboard.
- Hover over or click the link to the Profile.
- Examine this url and you will see the ID of the Profile. For example, if the URL is
http://www.bu.edu/yoursite/wp-admin/post.php?post=36&action=edit
then the ID is 36.
Exclude Profiles
The following shortcode will list all Profiles on your site except the ones with IDs 36 and 37:
[bu_list_profiles exclude="36,37"]
Include Profiles
The following shortcode will list only those Profiles with IDs of 14, 15, and 17:
[bu_list_profiles include="14,15,17"]
Profile Order
When you use the BU Profiles shortcode to list your profiles, you can control the order by using the “orderby” attribute. With the “orderby” attribute in the shortcode, the profiles will be ordered alphanumerically by the value specified. You can use any of the standard fields for ordering (first_name, last_name, title, education, office, email, phone) plus any custom fields that have been added via a custom theme or plugin.
For instance, to list five profiles (with IDs of 12, 24, 27, 36 and 44) and to sort them by last name, your shortcode would look like this:
[bu_list_profiles include="12,24,27,36,44" orderby="last_name"]
If you are using the include="" property to list specific profile IDs and you want the profiles displayed in the same order you have listed them, you can specify orderby="include"
Granular Control with Shortcodes
You can use multiple shortcodes on the same page to include and exclude profiles to get any grouping(s) that you need.
For instance, let’s say you want to display the department head’s profile first, and that profile has an ID of 11. You next want to list the profiles of three senior faculty members (with IDs of 17, 22 and 37). Finally, you want to list the remaining faculty members on the rest of the page. You can accomplish this with three shortcodes:
- an include shortcode for ID 11;
- an include shortcode for IDs 17,22,37; and
- a shortcode for the remaining profiles that excludes the first 4 profiles you already listed (IDs 11,17,22,37).
For this example your shortcodes would look like this:
[bu_list_profiles include="11"]
[bu_list_profiles include="17,22,37"]
[bu_list_profiles exclude="11,17,22,37"]
Taxonomies
With the BU Taxonomies plugin enabled, you can create taxonomies that apply to your profiles and filter profiles by taxonomies using shortcodes.
Using One Taxonomy
Let’s say you want student profiles for current and former students. You could:
- Create a taxonomy called “affiliation” that applies to your profiles
- Create terms under the “affiliation” taxonomy – let’s say you create two terms: “current-student” and “former-student”
- To display only profiles of current students, you would use a shortcode specifying the taxonomy and term like this:
[bu_list_profiles affiliation="current-student"]
Using Multiple Taxonomies
The shortcode supports multiple taxonomies as well. Extending the example above, let’s say you want student profiles that are also categorized by area of study. You could:
- Create a taxonomy called “area-of-study” that applies to your profiles
- Create terms under the “area-of-study” taxonomy – let’s say you create three terms: “music” “theater” and “visual-arts”
- To display only profiles of current music students, you would use a shortcode specifying multiple taxonomies like this:
[bu_list_profiles affiliation="current-student" area-of-study="music"]
Using Multiple Terms With A Taxonomy
You can use multiple terms in a taxonomy separated by commas; this acts as an “or” operator. So using the same examples as above, the following shortcode would display former students whose area of study was either music or visual arts:
[bu_list_profiles affiliation="former-student" area-of-study="music,visual-arts"]
Having Problems With A Published Profile Not Showing Up?
Last name is a required field for profiles to display on the profiles template and via the shortcodes.
